Snappy Photo Filters and Stickers for Chat
Create unique photos with Snappy Photo Filters and Stickers for Chat, and undoubtedly, get more likes and followers by using this app!

Make unique photos with Snappy Photo Filters and Stickers for Chat – and get more likes and followers in no time!
Add smiley doggy faces, rainbow filters, cute rabbits, anime eyes, tears, fun text, cool stickers, cartoon effects, and so much more to your selfies – all in just a few seconds!
Easily add text anywhere on your photo with our unique and easy-to-use text feature.
After adding smileys, text, and stickers, you can move and place them anywhere to customize your image just the way you like.
The filters not only make your photos fun and creative but also perfect for sharing on any platform like Facebook, Twitter, and more!
This app offers two main features:
Create Cartoon
Photo Editor
Use Snappy Photo Filters and Stickers for Chat to snap amazing selfies every time!
Add emojis and filters to your photos – we’ve packed in tons of fun emojis and stickers so you can create even more playful and exciting pictures with these awesome emoticons.
Download now and have fun!
Launch the Application
Once the installation is complete, open the application on your PC or laptop by clicking on its icon.
When the app launches, you will see two options on the main screen:
Create Cartoon
Photo Editor
Step 1:-
Create Cartoon:
Click on the Create Cartoon option.
Choose an image from your system’s gallery.
After selecting the image, you can flip or rotate it as needed.
Once you’re done, click the Crop & Next button to proceed to the next editing features.
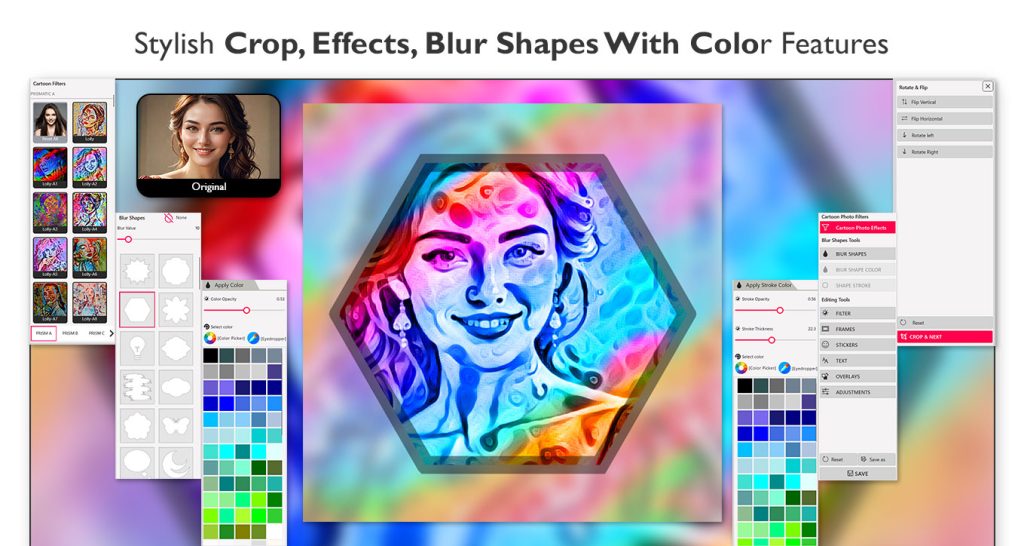
Step 2:- Apply Cartoon Photo Effect:
Click on the Cartoon Photo Effect option.
Browse through the variety of cartoon filters provided by the app.
The app offers lots of trending filter effects – feel free to explore them all!
You can try each filter one by one to see which one suits your photo best.
Once you’re satisfied with a filter, simply click Apply to set it.
Step 3:- Use Blur Shapes Tool (Advanced Options):
Open the Blur Shapes tool.
Choose your favorite shape (like a circle, heart, star, etc.).
Adjust the Blur Value to control how strong or soft the blur effect appears.
You’ll also find more customization options:
Shape Color: Pick a color to fill the shape for a creative touch.
Shape Stroke: Adjust the stroke width and color to outline the shape for added emphasis and style.
Step 4:–
One-Click Creative Tools:
After using the Blur Shapes tool, you can continue enhancing your photo with just a click!
Explore these easy-to-use features:
Filters: Instantly change the mood and style of your photo with various preset filters.
Frames: Add stylish or fun frames to give your photo a finished look.
Stickers: Choose from a wide collection of fun and expressive stickers.
Text: Add text with customizable fonts, colors, and styles.
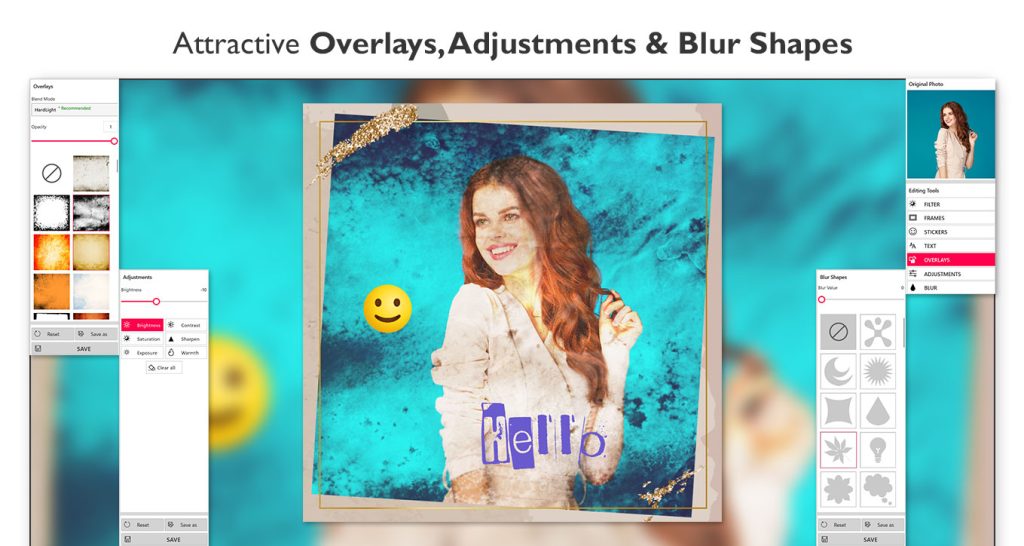
Overlays: Apply light effects, textures, and artistic overlays for a unique touch.
Adjustment: Fine-tune brightness, contrast, saturation, and more to perfect your image.
All of these can be applied with just a tap or click—easy, quick, and fun!
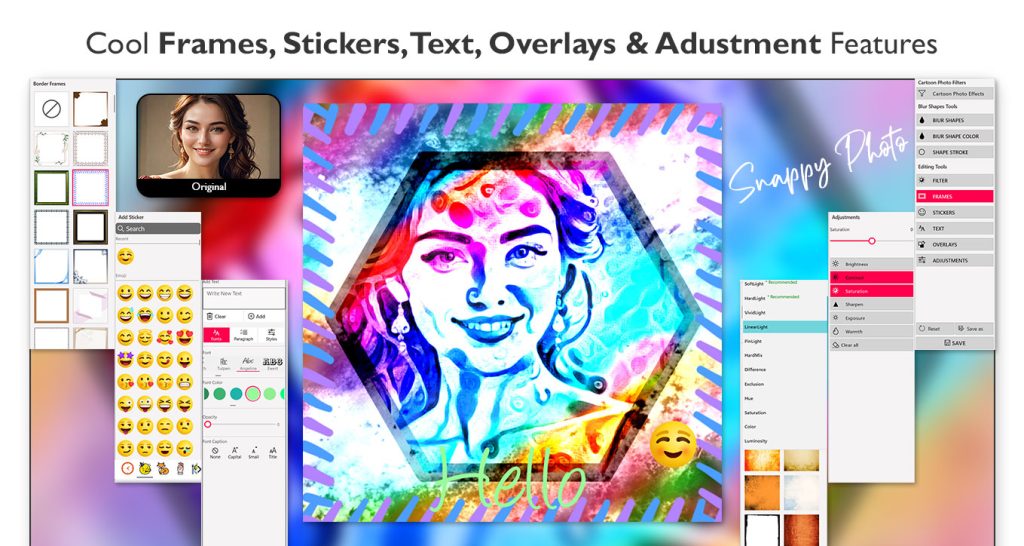
Photo Editor :-
Step 1:-
Click on the Photo Editor option.
Choose an image from your system’s gallery.
After selecting the image, you can flip or rotate it as needed.
Once you’re done, click the Crop & Next button to proceed to the next editing features.
Step 2:- Apply Filters
Tap on the Filter option.
Browse through a wide selection of preset filters.
Try different filters to change the mood, tone, and color of your photo (e.g., vintage, black & white, vibrant).
Click Apply to set your chosen filter.
Step 3:- Add Frames
Select the Frames option.
Pick from various frame styles such as classic, modern, festive, or fun themes.
Adjust the frame’s thickness or color if customization is available.
Apply the frame to give your photo a polished edge.
Step 4:- Insert Stickers
Click on Stickers to open the sticker gallery.
Choose from categories like emojis, fun graphics, accessories, seasonal themes, and more.
Drag and drop stickers anywhere on your photo.
Resize or rotate them to match your style.
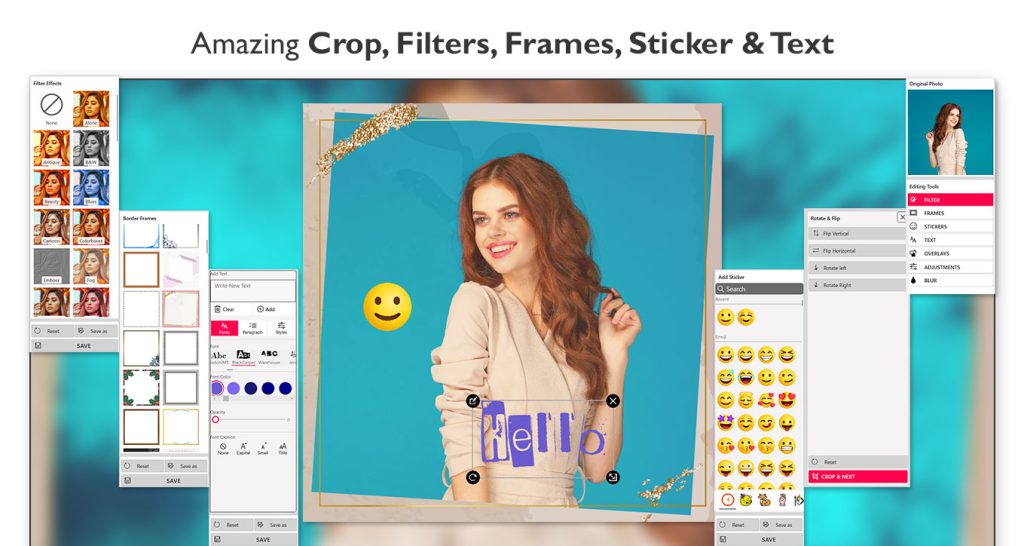
Step 5: Add Text
Tap on the Text tool.
Type your custom message or quote.
Customize the font, color, alignment, and background.
Move the text box anywhere on the photo and resize it as needed.
Step 6: Use Overlays
Select the Overlay option.
Choose from a variety of textures, light leaks, sparkles, or abstract designs.
Adjust the opacity to blend the overlay seamlessly with your photo.
Step 7: Adjust Your Image
Go to the Adjustment tool.
Fine-tune key elements like:
Brightness
Contrast
Saturation
Sharpness
Exposure
Use sliders to get the exact look you want.
Step 8: Add Blur Effects
Select the Blur option.
Choose from different blur types (linear, radial, full).
Adjust the intensity of the blur using the slider.
Great for background blur or adding focus to your subject.