Merry Christmas Photo Frames
Christmas Frames” is a free and user-friendly photo frame app available for download at any time or place of your convenience. The application is equipped with a variety of uniquely designed Christmas frames for you to choose from. Simply select a photo from your smartphone’s picture gallery or capture a new one using the camera, and use these delightful photo frames to enhance and beautify your images.

May your Christmas be filled with joy and laughter! Ho ho ho.
We extend our warm wishes for happiness, new goals, achievements, and abundant motivation in your life. Here’s to a year brimming with joy and success. We wish each day of the new year to be filled with accomplishments and victories for you.
To make your Christmas and New Year even more special, we introduce “Merry Christmas Photo Frames.” Capture the memories you create on these festive days and cherish them forever. This app presents a variety of frames carefully curated with the Christmas theme in mind. Whether you’re celebrating and partying hard, this app allows you to save those precious moments as keepsakes.
Key Features:
- Free and user-friendly photo frame app.
- Downloadable at any time and place of your convenience.
- Various uniquely designed Christmas frames to choose from.
- Pick a photo from your gallery or take a new one with the camera.
- Beautify your photos with specially curated Christmas frames.
- Engage with various effects on your photos.
- Rotate and scale the photo as desired.
- Zoom in or out to fit the photo frame perfectly.
During this time of faith and family, may the true meaning of Christmas fill you with joy. Wishing you a Merry Christmas and a blessed New Year.
Our app offers a straightforward and productive user interface. You can also apply stickers related to Christmas celebrations and various themes to the frames. Decorate your photos with our user-friendly editing functions.
We value your feedback and recommendations! This application focuses on providing you with what you desire. Install it on your devices swiftly and enjoy the hassle-free experience it offers. Merry Christmas!
Guide to Use: Merry Christmas Photo Frames
- Download and install the app.
- Select a Christmas frame from the collection.
- Choose a photo from your gallery or take a new one.
- Beautify your photo with effects.
- Rotate, scale, and adjust the photo as desired.
- Add festive stickers to enhance the frame.
- Save your beautifully framed Christmas photo.
- Share your festive memories with friends and family.
- Enjoy the holiday season!
Christmas Frames – User Guide
Step 1:- Launching the Application and Accessing ‘Christmas Frames’
Once the ‘Merry Christmas Photo Frames’ application is fully downloaded, launch it by clicking on the app icon.
Explore the application menu and locate the ‘Christmas Frames’ feature.
To access ‘Christmas Frames,’ follow these steps:
- Open the ‘Merry Christmas Photo Frames’ app.
- Choose the ‘Christmas Frames’ option from the menu.
The app will then direct you to the library of your device where all your photos are stored.
Browse through your gallery and select the photo you wish to beautify with a Christmas frame.
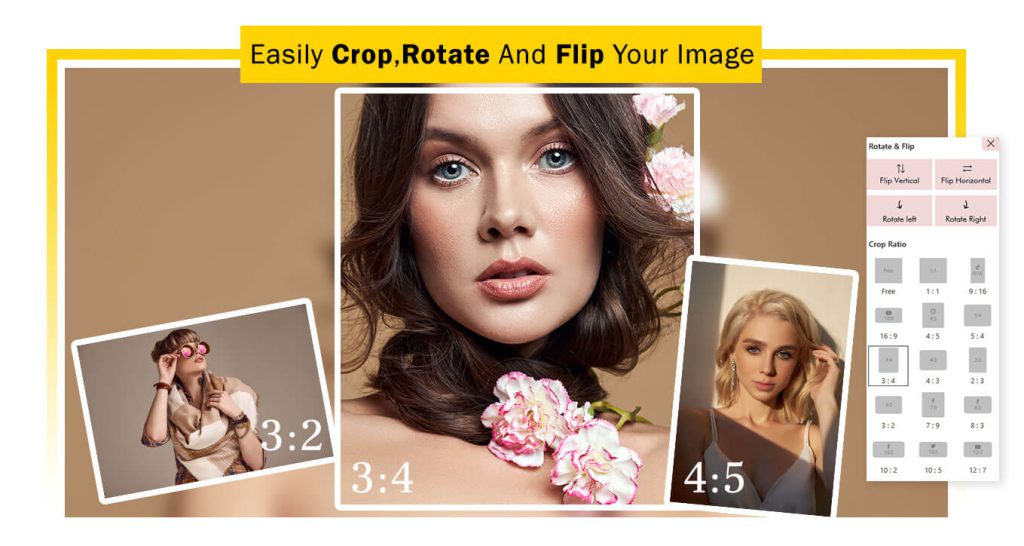
After selecting the photo, crop it as needed and choose your preferred social media aspect ratio.
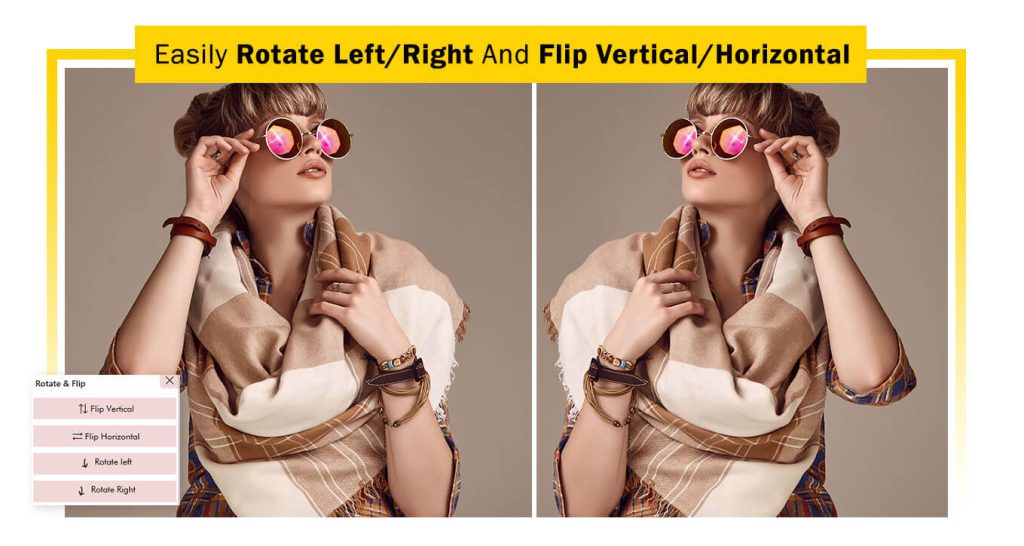
If desired, use the flip or rotate buttons to adjust the image orientation.
Once all editing processes are complete, click on the “Crop & Next” button to proceed to the next step
Step 2:- Add Festive Touch with Christmas Frames and Filters:
Now that your photo is ready, let’s enhance it with festive elements.
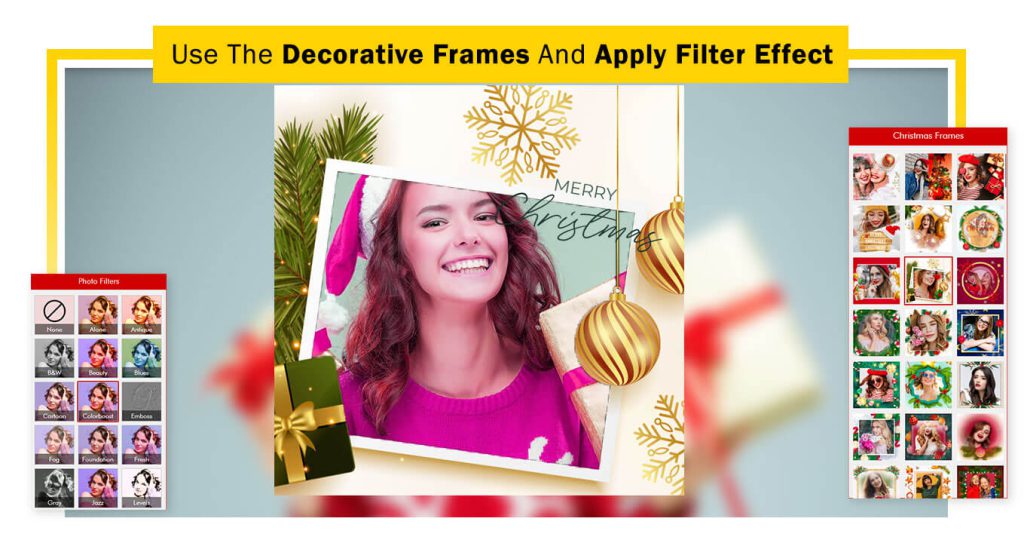
Click on the “Christmas Frames” button and select your favorite Christmas frame to apply to your image. Explore the wide variety of frames available and choose the one that best suits your preference. Enhance your image and give it a festive touch with the perfect Christmas frame.
After selecting the Christmas frame, click on the “Filter Effect” button. Access a range of filter options and browse through them to find the one that complements your Christmas frame and enhances the overall look of your photo. Filters can add different moods and styles, so choose the one that brings out the best in your image.
Enjoy the process of experimenting with filters and creating a stunning and festive Merry Christmas photo. Once you’re satisfied, proceed to the next step.
Step 3:- Fine-Tune and Personalize Your Christmas Frame:
Now, let’s delve into fine-tuning and personalization.
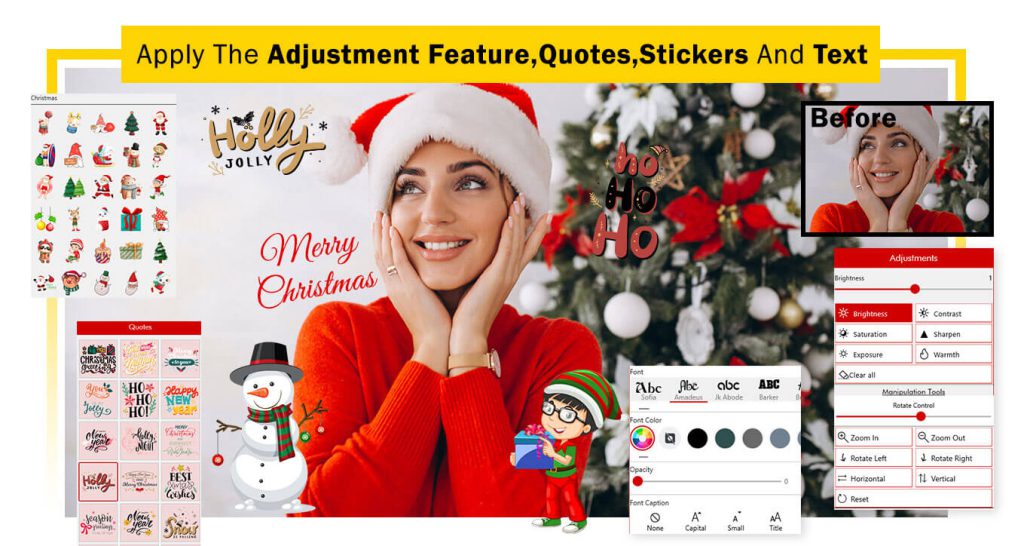
Click on the “Adjustment” button. This powerful tool lets you fine-tune aspects such as brightness, contrast, sharpness, warmth, saturation, and more. Adjust these settings to achieve the perfect look for your Merry Christmas photo frames creation.
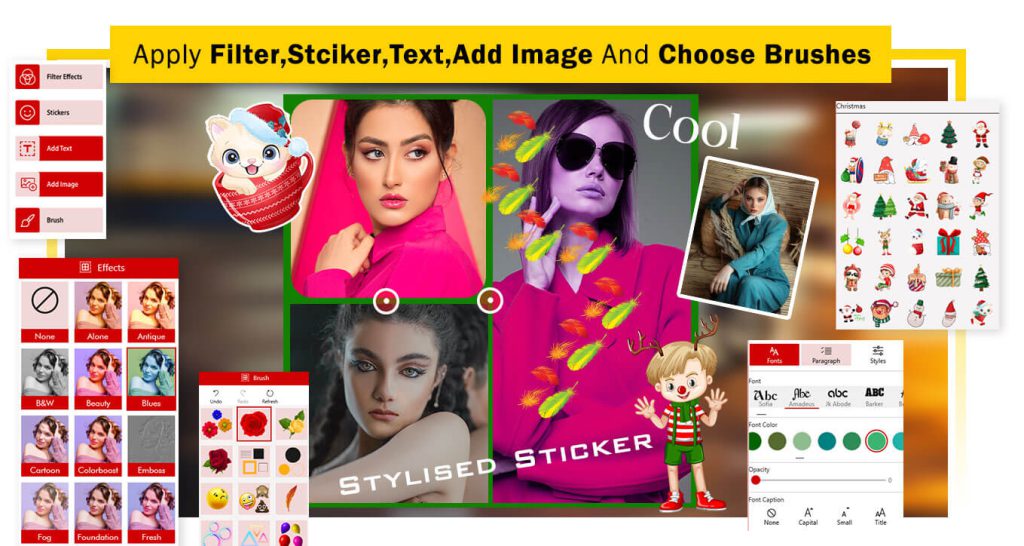
Explore the “Sticker” button. Find a wide range of sticker categories, each adding a fun and festive touch to your photo frames. Choose your favorite stickers and incorporate them into your Merry Christmas creation.
Discover the “Quotes” button, allowing you to add trendy and meaningful quotes to your Christmas photo frame. Quotes can add a personal touch, convey emotions, and enhance the overall message of your photo frames.
Utilize the “Add Text” button to personalize your Merry Christmas photo frame by adding text or a name. Choose from various font styles, adjust text color, opacity, and even add a background to make your text stand out against the frame.
The “Add Photo” button is a versatile tool that lets you include another photo as a sticker on your image creation. Get creative by blending different images together and crafting unique compositions.
Experiment with these features to make your Merry Christmas photo frames truly special and reflective of your style and sentiments. Once satisfied, you’re ready to save and share your festive masterpiece!
DP Creator: Craft Your Festive Display Picture!
Step 1:
- Introducing DP Creator: Experience the all-new “DP Creator” feature in our Merry Christmas Photo Frames application! Easily design your display picture (DP) by selecting the “DP Creator” option. Choose any image from your system gallery to infuse it with festive joy. Get ready to showcase your Christmas spirit with beautifully crafted photo frames and share the magic with friends and family. Let the celebrations begin! 🎄🎅🎁
- Customize Your Image: After selecting an image from your system gallery, it’s time to personalize it. Crop, rotate, and flip your image as desired. Fine-tune every detail to perfection. Once you’re satisfied with the adjustments, click on the “Crop & Next” button to seamlessly proceed to the next editing stage. Your image is now ready to be transformed into a festive display picture! 🌟
Step 2:- Add Stylish Frames:
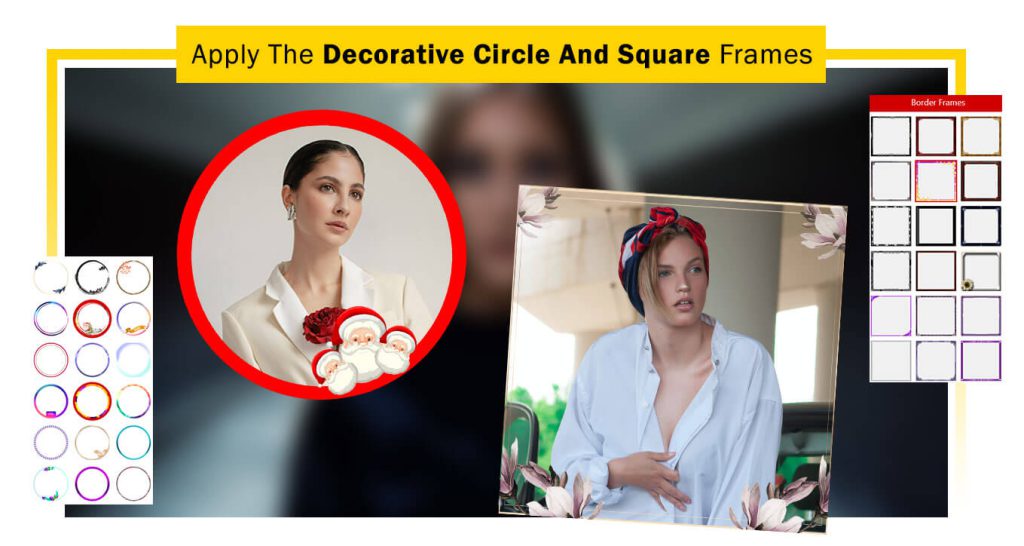
- Enhance your DP with stylish frames using the “Circle Frames” and “Square Frames” buttons. Explore a plethora of options as the app offers a variety of circle and square frames. Select your favorite frame to complement your image and add a touch of elegance to your festive display picture! 🌈🖼️
Step 3:- Add Artistic Touch and Finalize:
Now, let’s add artistic elements to your DP creation!
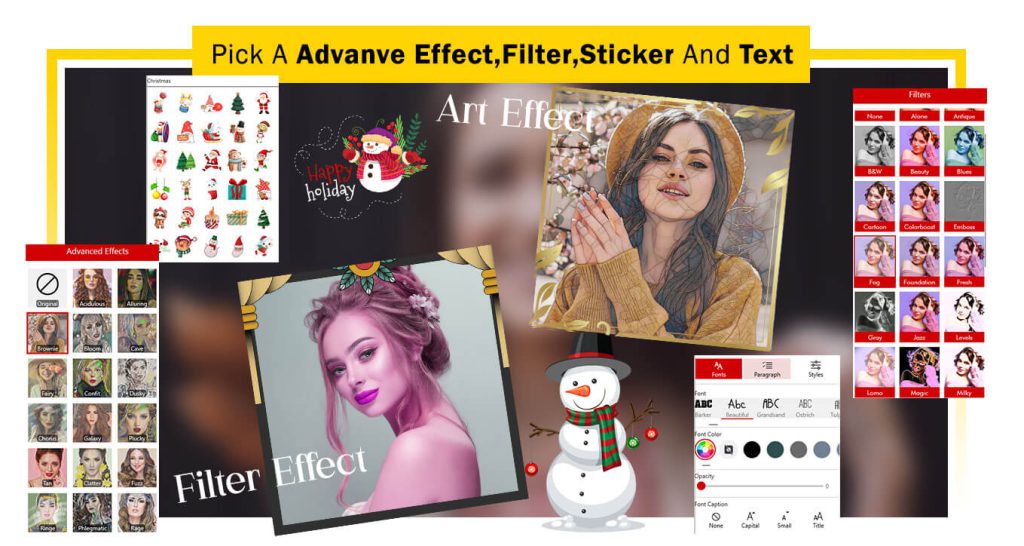
Click on the ‘Advance Effect’ button to infuse artistic effects into your DP image. Explore a variety of effects and choose your favorite to elevate your festive display picture.
The “Filter Effect” button allows you to apply a filter effect to your image creation. Select your preferred filter to enhance the visual appeal of your DP.
Utilize the ‘Background’ button to add a background to your DP image. Choose from a variety of backgrounds, and adjust the blur intensity to create the perfect ambiance.
Enhance your DP further by adding trendy stickers using the “Sticker” button. Explore the collection and select stickers that resonate with the festive spirit.
Add a personal touch with the “Add Text” button. Insert text or a name to your image creation. Customize the text color, font style, opacity, and more to make your DP uniquely yours.
You’re all set! Click on the “Save Image” button to preserve your DP creation. Your festive display picture is now ready to be shared and spread the joy of the season! 🌟📸
Collage Frames: Craft Stunning Compositions!
- Launch the Application: After the application is fully downloaded, initiate the process by clicking on it. The ‘Collage Frames’ functions are ready to assist you.
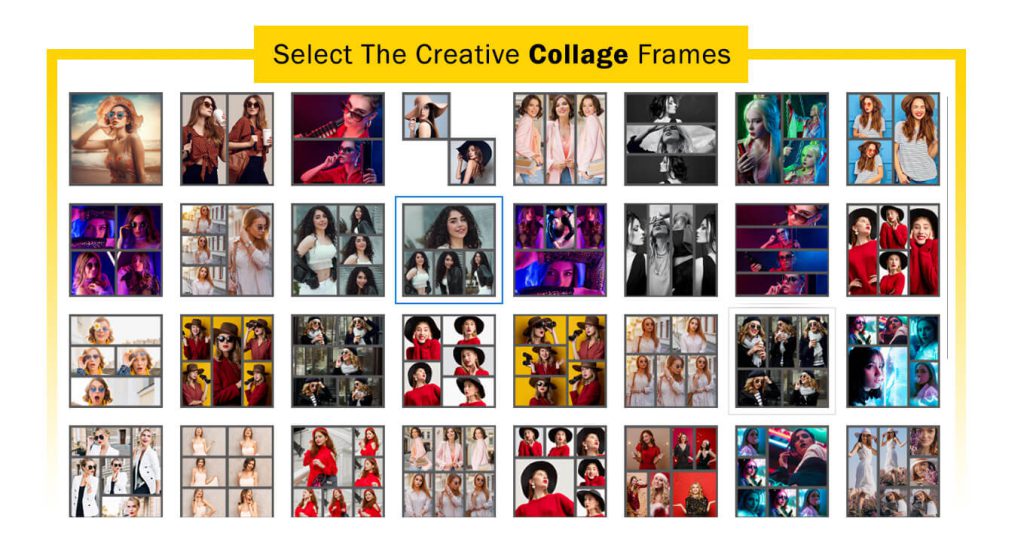
- Select Creative Collage Frames: Now, click on the “Collage Frames” button to explore a plethora of creative collage frames. The app offers a diverse range of options. Choose your favorite collage frame from the selection. After selecting your preferred collage frames, click on them, and proceed to choose multiple photos from your system file. Let the collage creation journey begin! 🖼️🌟
Step 2:- Customize Collage Settings:
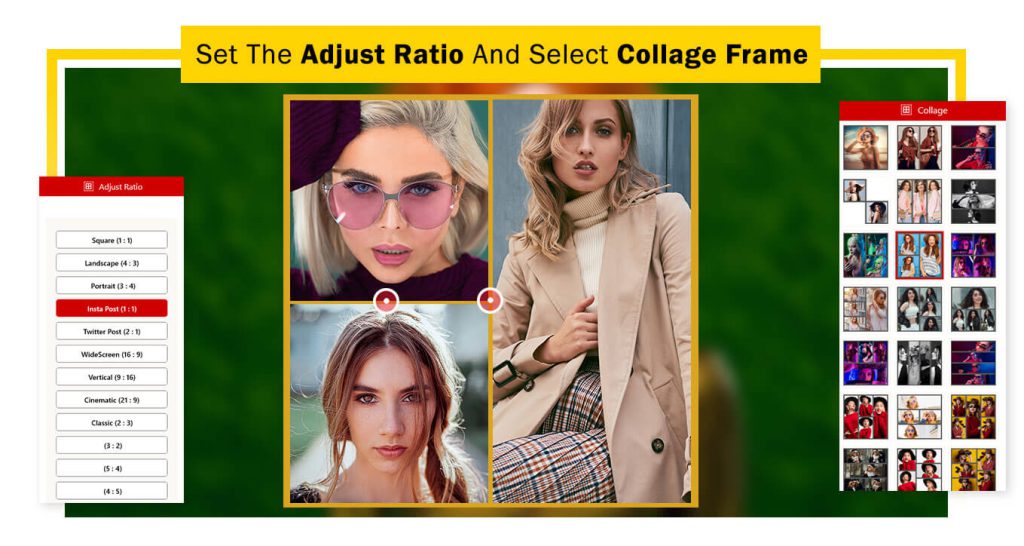
After selecting your favorite collage frames, click on the “Collage” button to proceed. Here, you have the option to choose another collage frame or change the currently selected one.
The “Ratio” button comes in handy for adjusting the aspect ratio of your collage. Choose a specific ratio that suits your favorite social media platform. Click on the “Ratio” button to select the desired aspect ratio, ensuring your collage looks perfect and fits well within the dimensions of platforms like Instagram, Facebook, Twitter, etc. Customize the ratio for optimal sharing! 🌐🖼️
Step 3:- Personalize Collage Appearance:
The “Color” button lets you customize the color of the border frames in your collage. Choose a color that complements your collage or aligns with your design preferences. This option adds a personalized touch to your collage, making it truly unique.
Explore the “Background” button to change the background of your collage frame. Select a different background color, pattern, or even incorporate an image as the backdrop for your collage. This feature offers versatility in creating the perfect visual setting.
The “Adjustment” button provides various tools to fine-tune and enhance the appearance of your collage images. Customize:
- Brightness: Adjust overall brightness for a lighter or darker collage.
- Contrast: Modify the contrast to enhance vibrancy.
- Sharpness: Improve image sharpness for a clearer look.
- Warmth: Fine-tune color warmth for the desired tone.
- Saturation: Control color intensity for vivid or muted tones.
Personalize every aspect of your collage to create a visually stunning composition that reflects your style and preferences. 🎨🌈

Step 4:- Apply Filters and Add Creative Elements:
The “Filter Effect” button opens up a world of trending and popular filter effects for your collage images. Apply these filters to infuse creativity and style into your creation. Filters can dramatically transform the overall look and mood of your photos, making them more captivating and visually appealing.
After applying the desired filter effect, explore the next editing features one by one:
Stickers: Click on the “Sticker” button to access a collection of fun and decorative stickers. Choose stickers that complement your collage’s theme and add playful or artistic elements by dragging and dropping them onto your images.
Add Text: Click on the “Add Text” button to insert text into your collage. Customize fonts, colors, and text sizes to create captions, titles, or convey any messages. Position the text boxes strategically on your collage.
Add Image: The “Add Image” feature lets you incorporate additional images into your collage. Select photos from your system file or use clipart or illustrations to complement your existing images.
Brush: The “Brush” tool allows you to draw or paint directly on your collage. Choose from various brush sizes and colors to add hand-drawn elements or artistic touches to your creation.
Experiment and customize your collage with each editing feature until it meets your satisfaction. Combine different elements, such as stickers and text, to craft a collage that reflects your unique style and creative vision. Enjoy the process of creating a beautiful and captivating collage that you can proudly share with others! 🎨🖼️