
New Year Frames
We present to you ‘New Year Frames’ to make your New Year more special by preserving the memories you created on that day or on New Year’s Eve for eternity. The application provides you with a variety of frames specifically curated to capture the essence of the New Year theme. Party hard and save your pictures as souvenirs using the mentioned application. As they say, ‘the moment gets passed, what remains is the remembrance.

How To Use New Years Frame
New Year brings new happiness, new goals, new achievements, and a lot of new motivation into your life. Wishing you a year fully loaded with happiness and success. We are excited to present to you ‘New Year Frames’ to make your New Year more special by preserving the memories you created on that day or on New Year’s Eve for eternity.
This application provides you with a variety of frames, all curated with the New Year theme in mind. So, whether you’re capturing moments from a New Year’s party or a quiet celebration, these frames are designed to enhance the essence of the occasion. Party hard and save your pictures as souvenirs using this application. As they say, ‘the moment gets passed, what remains is the remembrance.’
Trust this application to help you recollect your precious moments. New Year Photo Frames is a free and easy-to-use photo frame app that you can download anytime, anywhere.
It is equipped with various uniquely designed New Year frames for you to choose from. Simply select a photo from your smartphone’s picture gallery or take a new photograph, and use these photo frames to beautify it. The app offers various effects on your photo like Sepia, Black & White, grayscale, and more! You have the flexibility to rotate, scale, zoom in, and zoom out the photo to fit the frame as you like.
The app provides a simple and effective user interface. In addition to frames, you can also apply stickers to further enhance your photos. Beautiful stickers or stamps related to New Year celebrations and different themes are embedded in the application, allowing you to embellish your photographs with ease. Any feedback and suggestions are welcome and appreciated!
This application is designed with a focus on providing you with what you desire. Quickly install it on your devices and enjoy the hassle-free experience that the application offers!
GUIDE TO USE: NEW YEAR FRAME
The developer looks forward to curating an aesthetic look for you through the application. To avail of the app’s features, click on ‘install’ to have it installed on your device or PC. Choose the ‘New Year Frame’ button to create a New Year frame photo with easy steps and a plethora of frame choices available.
NEW YEAR FRAMES
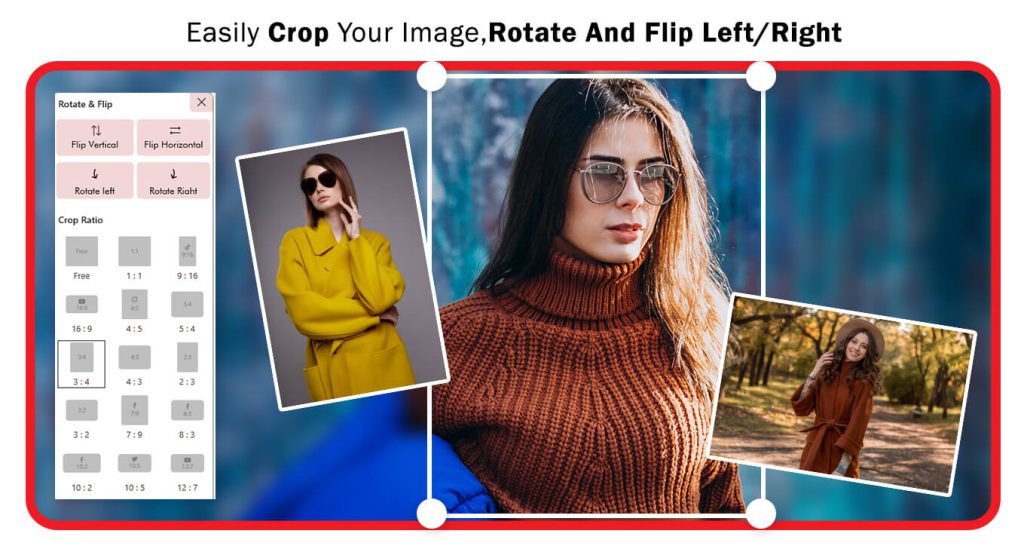
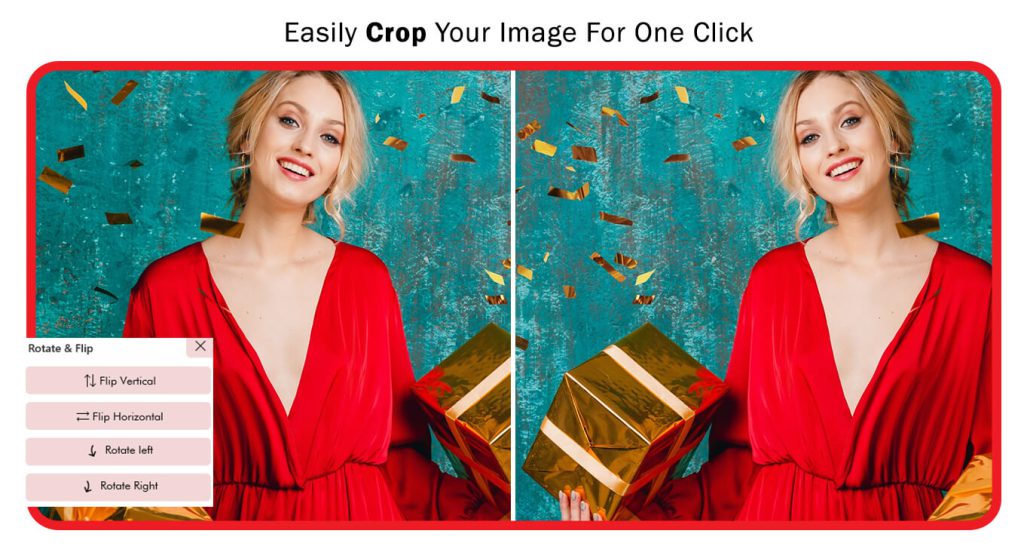
Step 1:- After selecting the “New Year Frames” feature, choose your photos from your computer’s files. Next, crop the selected photo and select your favorite aspect ratio. Then, rotate and flip your image as desired. Now, click on the “Crop & Next” button to proceed to the next editing feature.
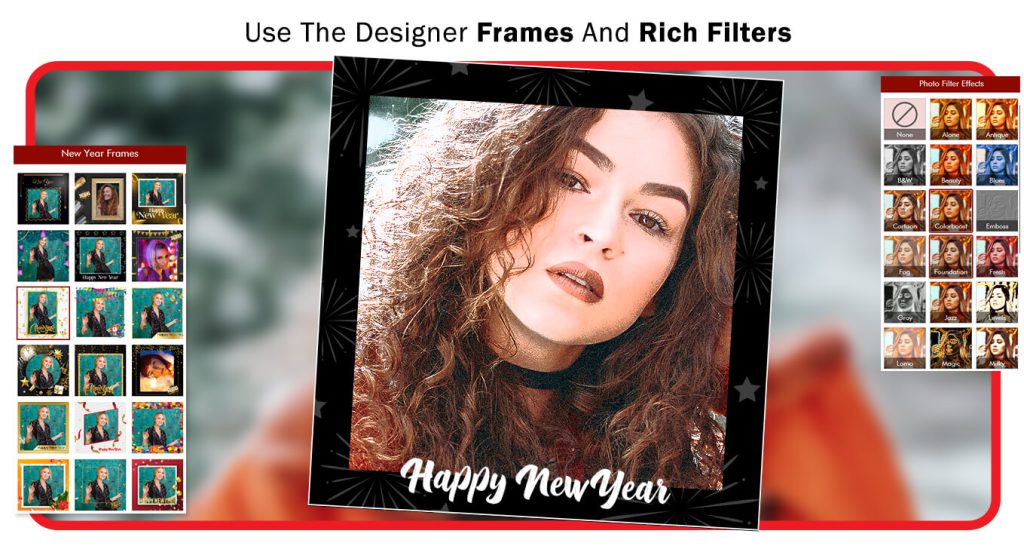
Step 2:- Next, click on the “New Year Frames” button and choose your favorite frame. The app provides a wide selection of frames, so feel free to browse and select the one that you like the most. Once you’ve made your choice, use the frame to enhance your photo and add a festive touch to it. Enjoy exploring the various options available!
After selecting the New Year frame for your image, click on the “Filter Effects” button. Explore the variety of filter effects available and choose your favorite one. Once you’ve found the perfect filter effect, apply it to your image to enhance its overall look and create a unique visual experience. Enjoy experimenting with different filters to give your image a personalized touch for the New Year celebration!
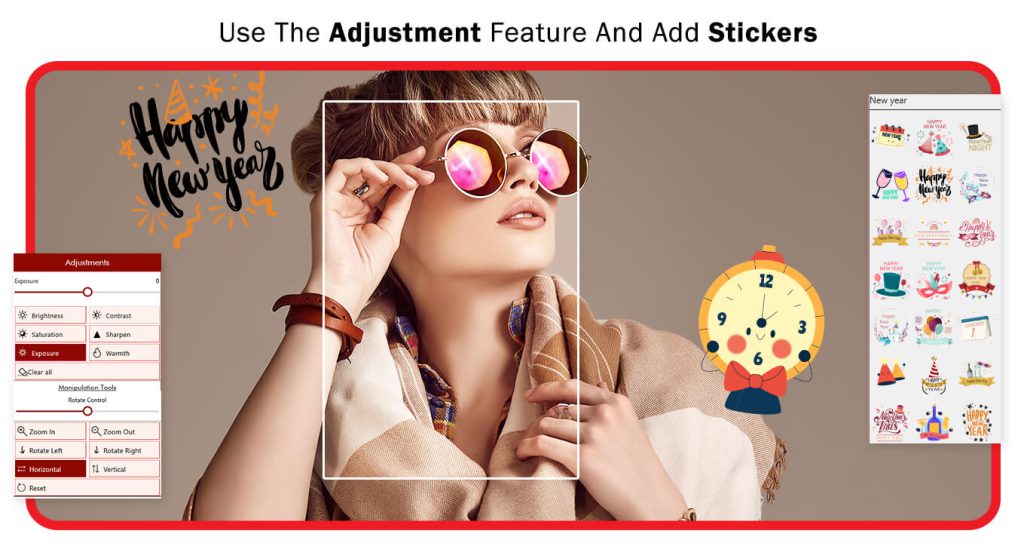
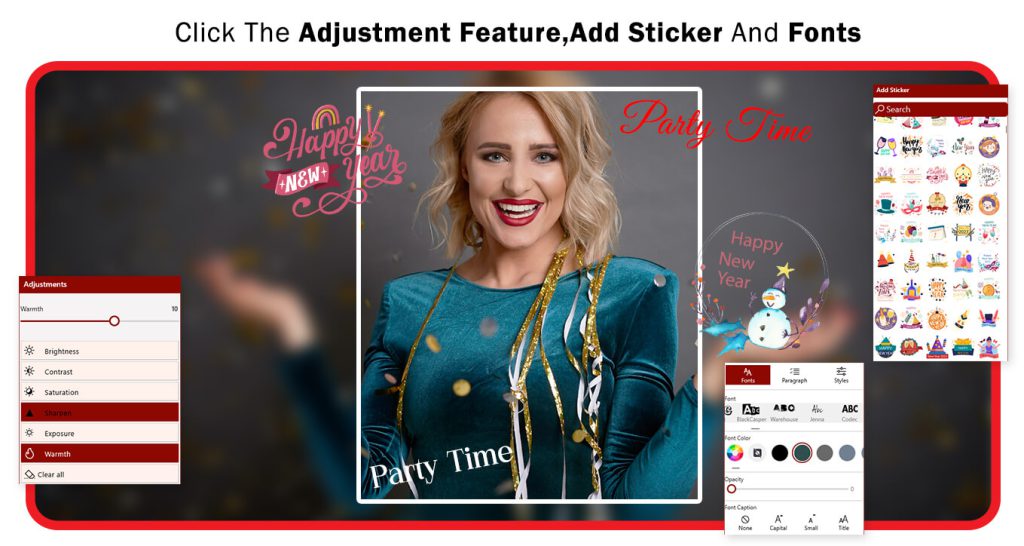
Step 3:- The “Adjust” button provides you with various options to fine-tune your image and achieve the desired look. Here are some of the adjustments you can make:
- Brightness: Control the overall brightness of the image, making it brighter or darker.
- Saturation: Adjust the intensity of colors in the image, making them more vibrant or muted.
- Sharpen: Enhance the sharpness of the image to bring out more details.
- Warmth: Adjust the color temperature of the image to make it warmer (more yellow/red) or cooler (more blue).
- Exposure: Control the overall exposure level of the image, brightening or darkening it.
- Contrast: Adjust the difference between light and dark areas in the image to add depth and definition.
The “Stickers” button helps you apply trendy stickers to your image creations.
Step 4: –
- The “Quotes” button helps you add trendy quotes to your New Year image creations. Simply click and choose your favorite quotes to use them.
- The “Add Text” button allows you to insert text or give a name to your New Year image creation. Additionally, you can change the text color, font style, adjust opacity, and much more. It offers a variety of options to customize the text according to your preferences.
- The “Add Image” button enables you to incorporate additional visuals into your image creation. Simply click the button and choose your desired image from your system files to use in your project. It’s a straightforward process that allows you to enhance your creation with extra visuals.
- Great job! Now, click on the “Save Image” button to save your completed image creation. After clicking the button, you’ll be prompted to choose a location on your device where you want to save the image. Give it a name if needed, and then click “Save.” Your image will be saved and ready for you to share, print, or use as you wish. Well done on creating your masterpiece!
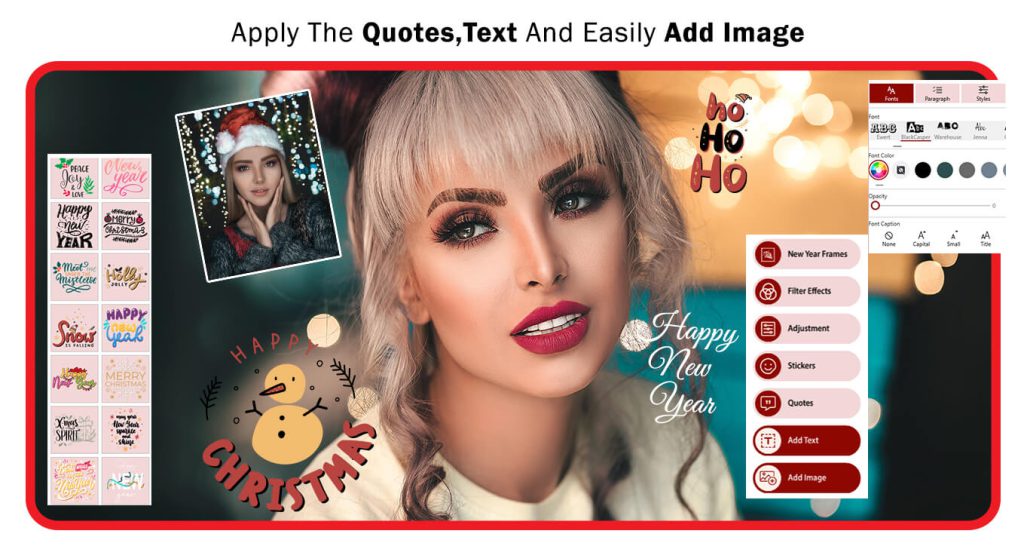
PHOTO EDITOR:- How to use Photo Editor in New years Frame Application.
Step 1: –
There is a new feature in this application where you can edit your photos and add amazing and cool stickers, borders, and lots more with New Year Frames.
- On the homepage of the application, click on the “Photo Editor” button.
- Choose the photo you want to edit from your computer files. You can select any image you like from your gallery.
- Once you’ve chosen your picture, you can crop it to your desired dimensions or select a social media aspect ratio. The application offers various aspect ratios to match different social media platforms. Additionally, you can flip or rotate your image as needed.
Step 2:-
- After you have cropped and flipped the image to your liking, click on the “Crop & Next” button to move on to the next editing features. This button will take you to the next step of the editing process, where you can explore additional tools and options to enhance your image further.
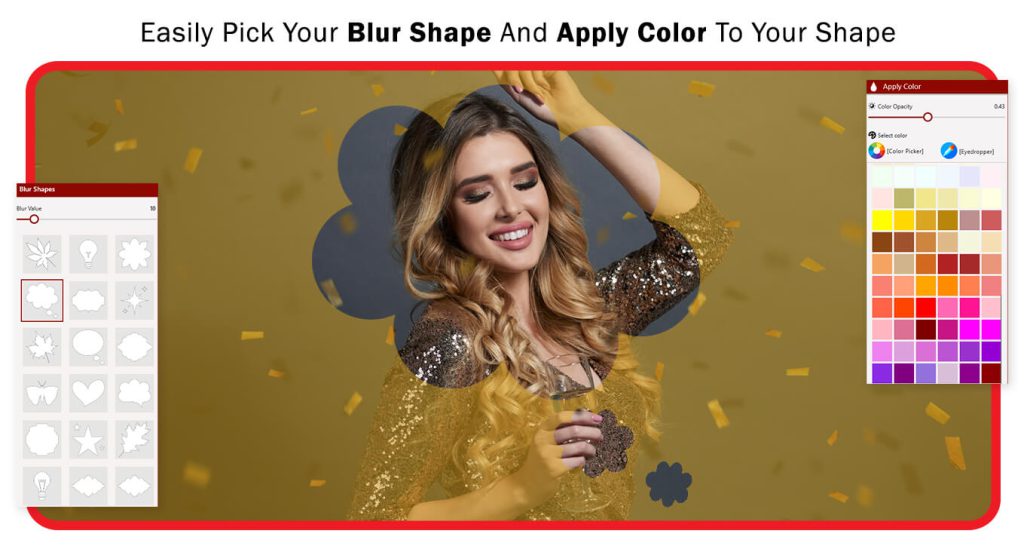
- Now, click on the “Blur Shape” button to access a wide variety of trendy shapes. Choose your favorite shape from the options available and apply it to your image. The application provides an extensive collection of shapes to choose from, allowing you to add a stylish and creative touch to your photo. Explore the different shapes and find the one that best complements your image.
- After applying the shape to your image, click on the “Shape Color” button to select your favorite color for the shape. The application will present you with a color palette or options to choose from. Pick the color that best suits your image and complements the overall aesthetics. With the chosen color, your shape will look even more attractive and visually appealing.
Step 3:-
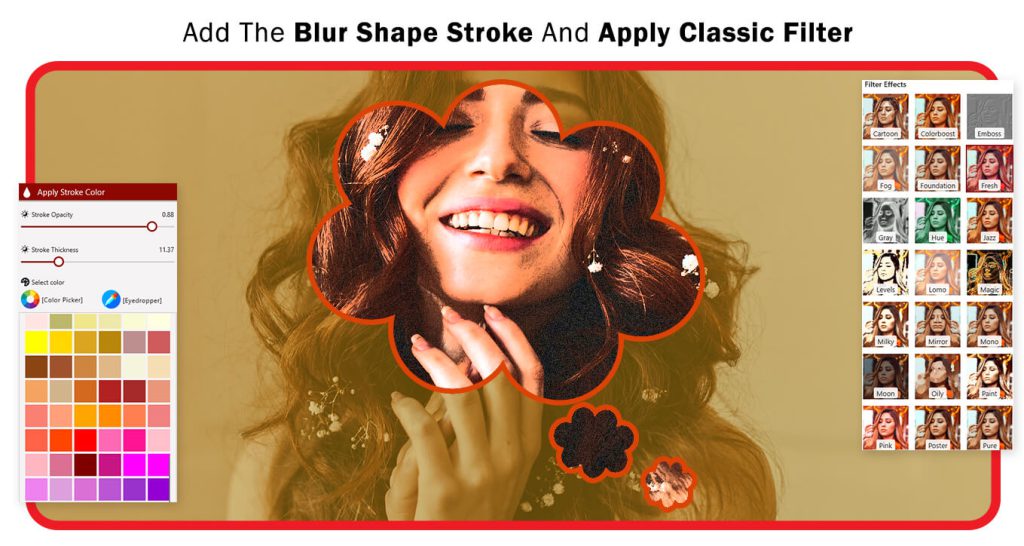
Now, click on the “Shape Stroke” button to add a stroke to your shape. You can adjust the stroke opacity and thickness to customize how the stroke looks. Additionally, you can select a color for the stroke that enhances the overall appearance of your shape.
Now, click on the “Filter Effect” button to explore a range of filter effects that can elevate the look of your image creation. You’ll find a variety of stylish filters to choose from, each providing a unique enhancement to your photo.
Step 4: –
The “Frames” button is a fantastic feature that allows you to add trendy frames to your image creation. By clicking on the “Frames” button, you’ll gain access to a variety of stylish and decorative frames.
The Overlay button helps you apply overlay effects to your image creation. Just choose your favorite overlay effect, adjust opacity, and use it.

Step 5: –
The “Adjust” button helps you fine-tune your image by adjusting brightness, contrast, sharpening, exposure, and more.
The “Stickers” button allows you to add stickers to your image creation. Just choose your favorite sticker and apply it.
You can also add text to your picture using the “Add text” icon. Click on the “Add text” button, write text in the designated area, choose the font style and font color, and set the text on the photo.
Save and share the picture using the “Save Image” icon according to your specifications.