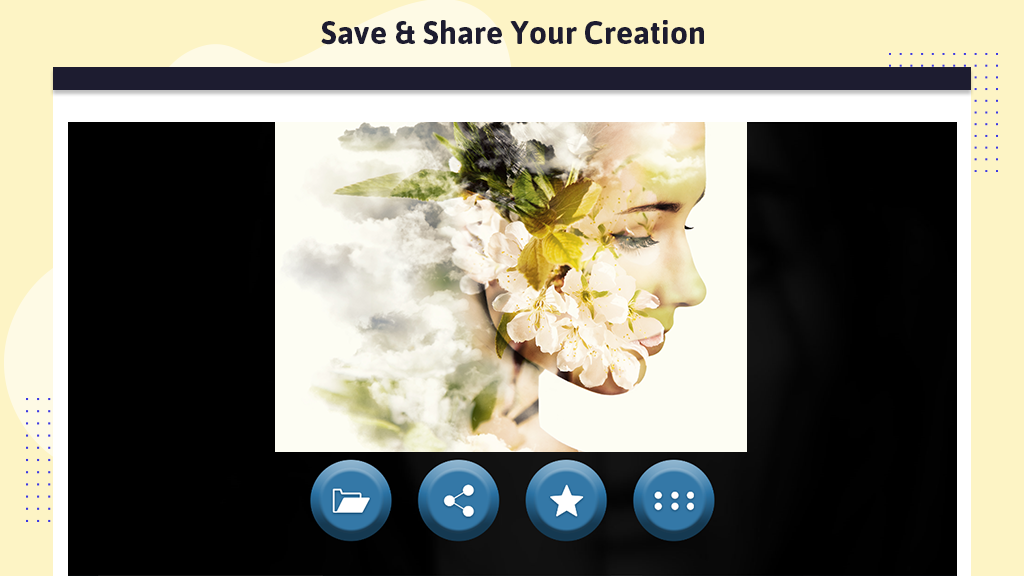
Professionally Edit Your Images.
Editing is a prerequisite for enhancing the beauty of your images and placing them in a completely different spotlight. Rest assured, we’ve got your back with an array of professional tools for editing in this magnificent application we’ve created for our users.

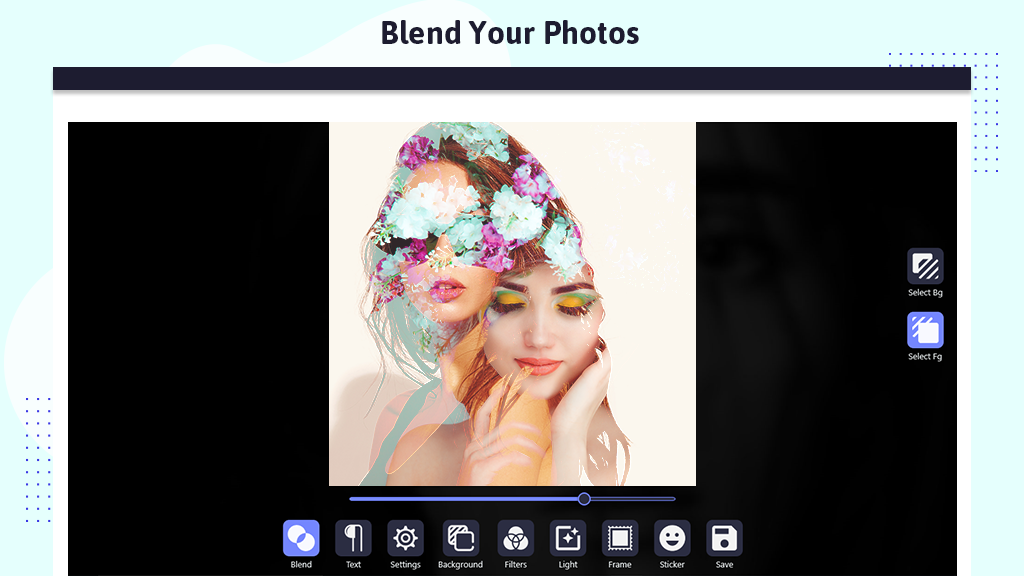
The techno-savvy world introduces yet another enticing feature – the ability to seamlessly blend two photos into one.
With Photo Blender, a simple yet powerful app, you can merge two of your images into a single photo, creating a magical blend effect. The application allows for a transparent overlay of the first photo onto another photo from your gallery or camera. Direct yourself by selecting any two pictures, whether they are of the same person in diverse poses or pictures of two entirely different individuals.
Adjusting the blend level is effortless with this application. The Blender Camera is user-friendly, boasting a pleasant interface. The app offers a range of fantastic filters, diverse backgrounds, a crop function, beautiful frames and stickers, and a meter for adjusting brightness, warmth, contrast, saturation, tint, sharpen, blur, highlight, and shadow. These settings can be increased or decreased to make your blended images even more astounding.
Click on the ‘Apply’ button and proceed to the next effects to further beautify your photos. You have the flexibility to rotate, zoom in, and zoom out on both blended images. Don’t worry about mistakes and pitfalls, as you can use the Undo or Redo effects.
Guide to use: BlendMix – Photo Blend
Now, let’s talk about enhancing your images through professional tools:
“Editing is a prerequisite for enhancing the beauty of your images and placing them in a completely different spotlight. Rest assured, we’ve got your back with a myriad of professional tools for editing in this magnificent application we’ve created for our users.”
Step 1:-
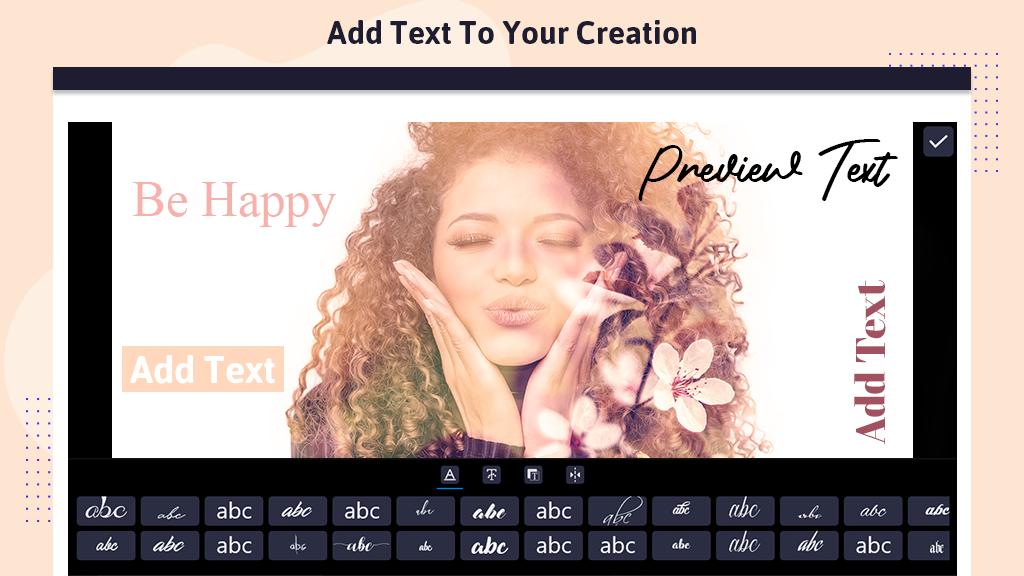
In the realm of icons, the next eight tools are at your disposal for selection and editing. The first tool is the “text tool.” Write text on your blend photo using an array of awesome font styles and a wide range of color options. Infuse your photos with text to make them more compelling.
Step 2:-
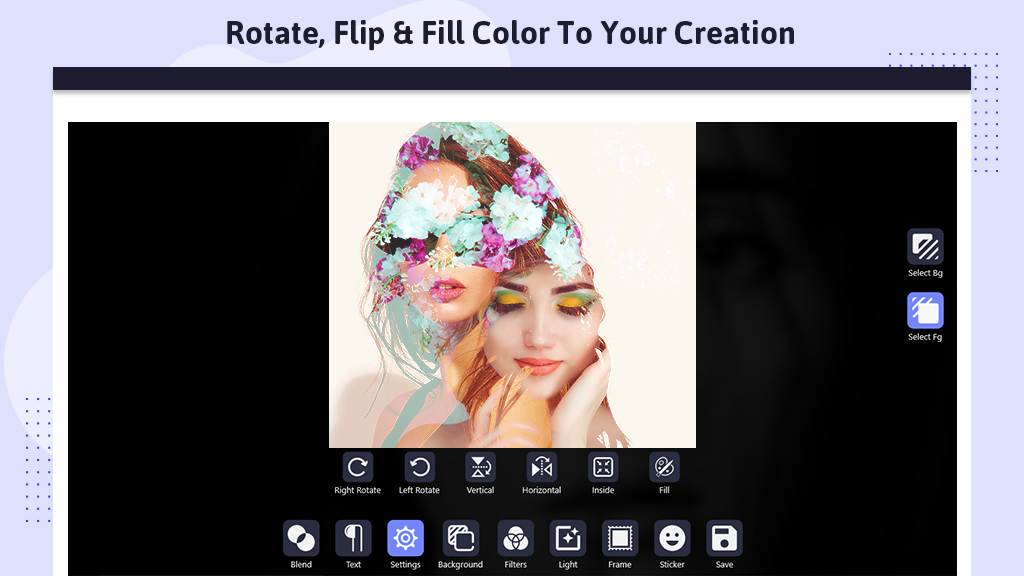
The next two icons are “Settings” and “Background.” From these icons, you can make changes to the background of the photo and adjust them with new editing tools. Click on “Background” to choose from various options, allowing you to blend your image with different aesthetic backgrounds. There is a wide variety of backgrounds available for selection.
By exploring the “Settings” option, a set of six tools appears: ‘Right Rotate,’ ‘Left Rotate,’ ‘Vertical,’ ‘Horizontal,’ ‘Inside,’ and ‘Fill.’ Utilize these tools to intensify the enhancement of your picture.
Step 3:-
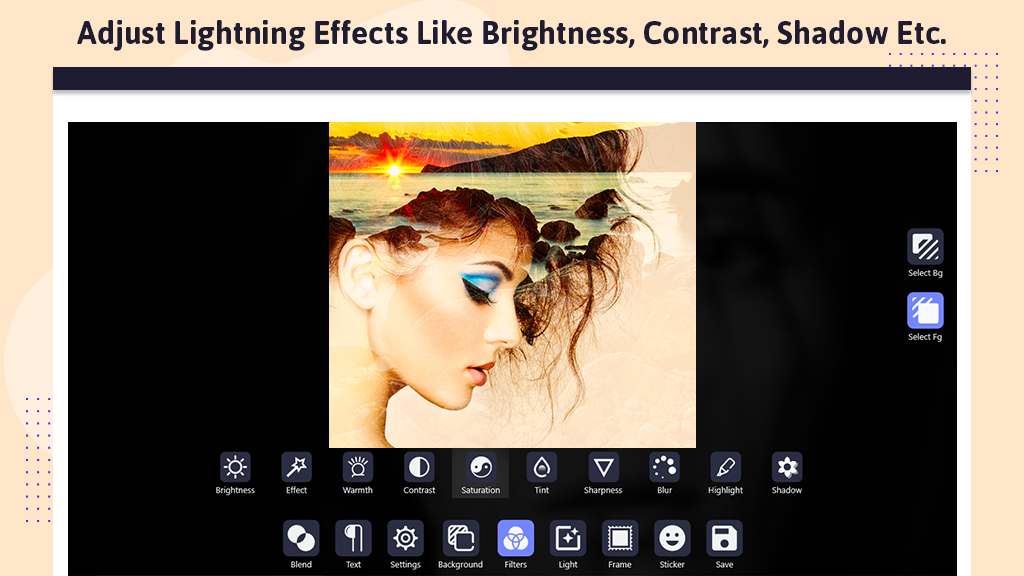
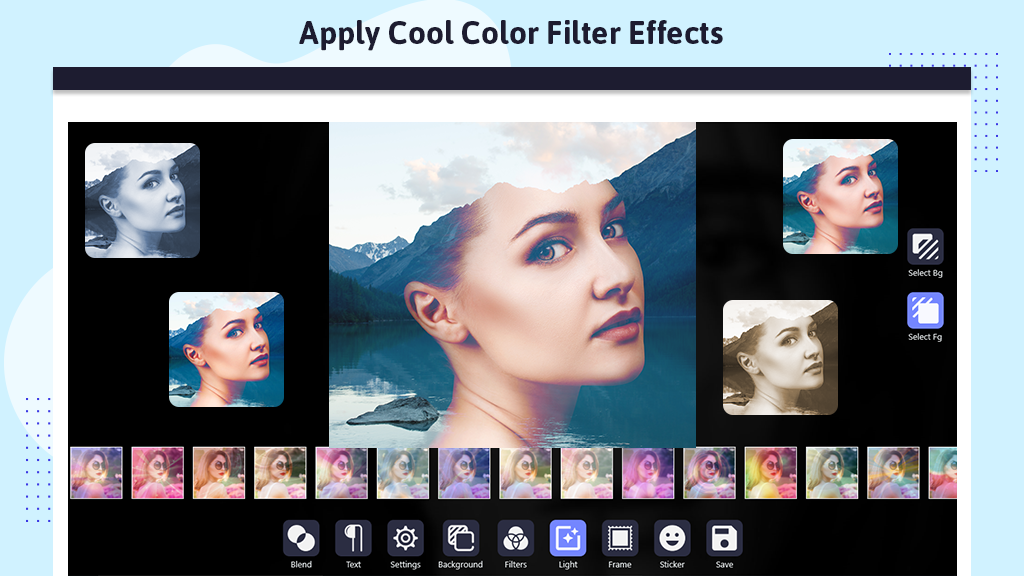
Assuming you are becoming well-versed with the aforementioned icons, let’s move forward. Click on the “Filter” button and select a filter to apply beautiful photo filter effects to your photo. There’s a pool of gorgeous filter effects available that you can use to enhance your photos. Click on “Brightness” to set the photo brightness.
Choose a filter option, and a variety of filters such as Brightness, Effect, Warmth, Contrast, Saturation, and many more will appear for selection and application.
Step 4:-
Moving on to the next effect – the “Light Effect.” Click on Light Effects to apply stunning light effects to your photo. A myriad of gorgeous light effects are available for you to choose from and apply.
Step 5:-
Click on the frame button and choose from a variety of awesome frames. There are numerous amazing photo frames available for selection. Click on any frame to apply it to your photo. Handpick from various photo frames, each designed beautifully to enhance your photo.
Step 6:-
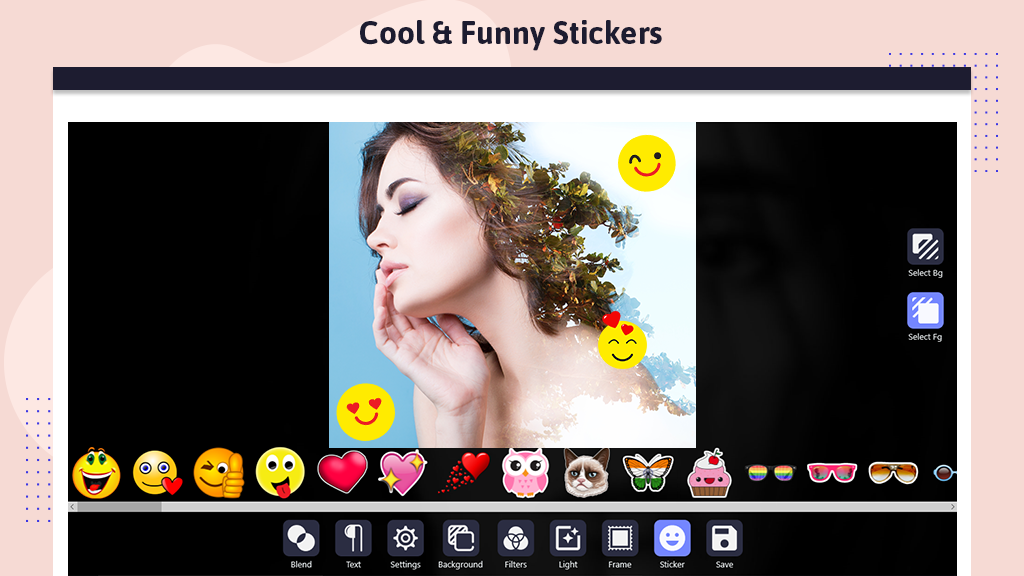
Click on the sticker button and choose funny and cool stickers for your photo. Click over the stickers to apply them. Personalize your photo with a touch of humor or style using a variety of stickers.