
Blend Images From Your Gallery.
Blend any two of your photos into a single image to create a magical blend effect with Photo Blender.

Welcome to the tech-savvy world, where another exciting feature awaits—the seamless blending of two photos into one.
Meet Photo Blender, a simple yet powerful app designed for merging two images into a single, magical blend. This application allows for a transparent overlay of the first photo onto another from your gallery or camera. Whether you’re capturing the same person in diverse poses or combining pictures of entirely different individuals, the possibilities are endless.
Adjusting the blend level is a breeze with this user-friendly application. The Blender Camera offers a pleasant interface and an array of fantastic filters, diverse backgrounds, a crop function, beautiful frames and stickers, along with a meter for fine-tuning brightness, warmth, contrast, saturation, tint, sharpen, blur, highlight, and shadow. These settings can be increased or decreased to make your blended images even more astounding.
Click on the ‘Apply’ button and explore the next set of effects to further beautify your photos. Enjoy the flexibility to rotate, zoom in, and zoom out on both blended images. Worried about mistakes? Fear not, as the Undo or Redo effects are at your disposal.
User Guide: BlendMix – Photo Blend
We understand the value of your precious time and aim to save it by providing the Gallery feature, allowing you to choose an image already stored on your device.
Step 1:-
- Click on the ‘Image‘ button and choose a photo from your file storage.
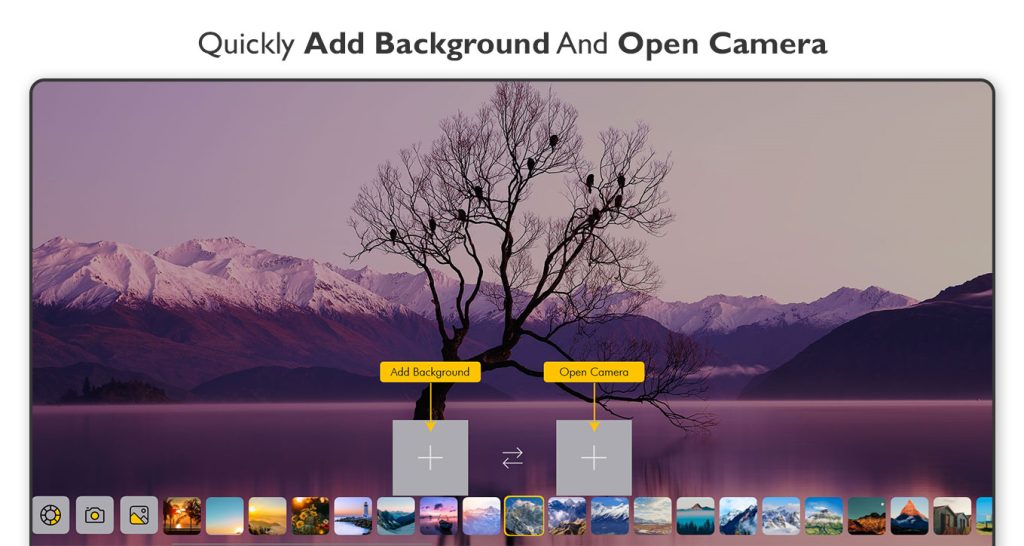
- After selecting ‘Blend with Image,’ choose the background and foreground images.
- Once you’ve chosen the images, click on the ‘Blend Image‘ button to seamlessly blend the photos.
Step 2:-
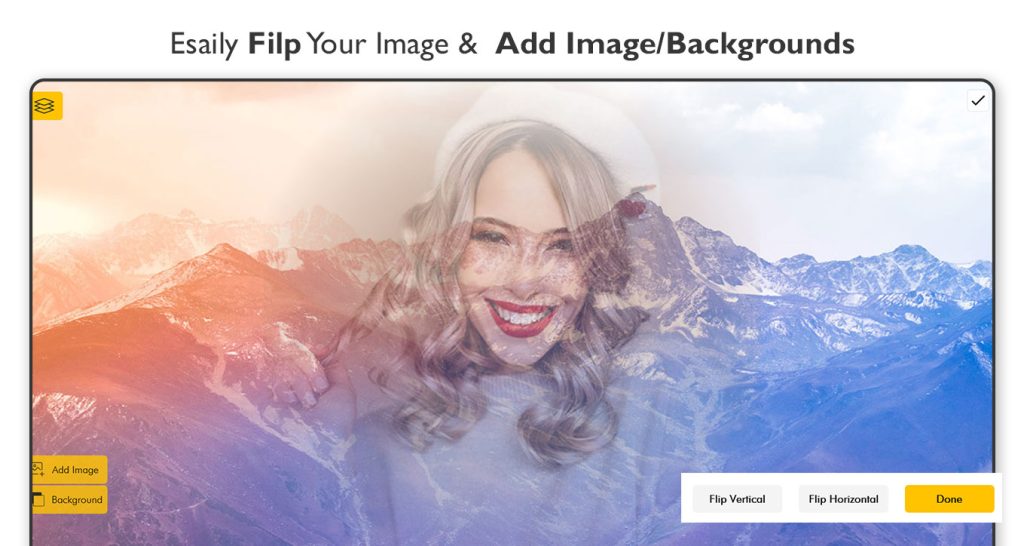
- Now, crop, flip, or rotate the image as needed, then tap the ‘Done’ button to proceed to the next editing feature.
Step 3:-
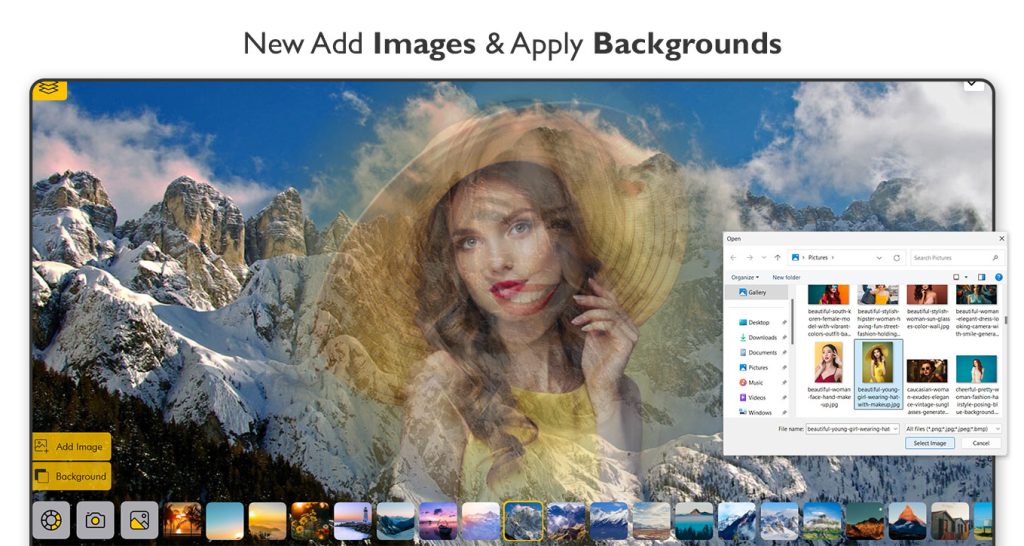
- Now, tap the ‘Add Image’ button to insert additional images and create a blended image composition.
- Tap the ‘Background’ button to add a background using a solid color, by capturing a new image, or by uploading one from your gallery. You can also choose from the app’s provided trending backgrounds.
Step 4:-
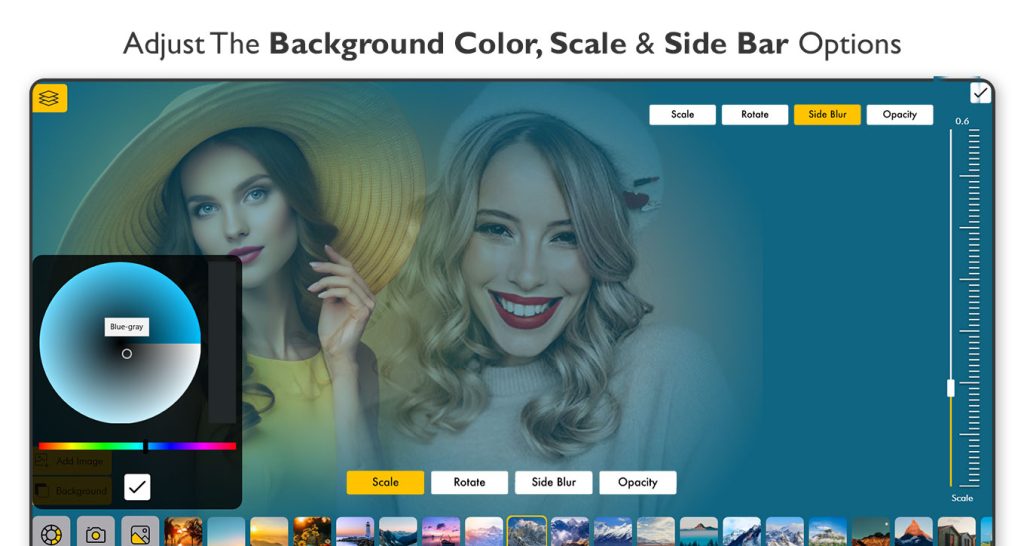
- Now, tap on ‘Scale’ to adjust the size, use ‘Rotate’ to adjust the angle, and apply ‘Side Blur’ as needed. You can also adjust the Opacity to your preference.
- Once all adjustments are complete, tap the ‘Next’ icon to proceed to the next editing feature.
Step 5:-
- Now, crop, flip, or rotate the image as needed, then tap the ‘Done’ button to proceed to the next editing feature.
Step 9:-
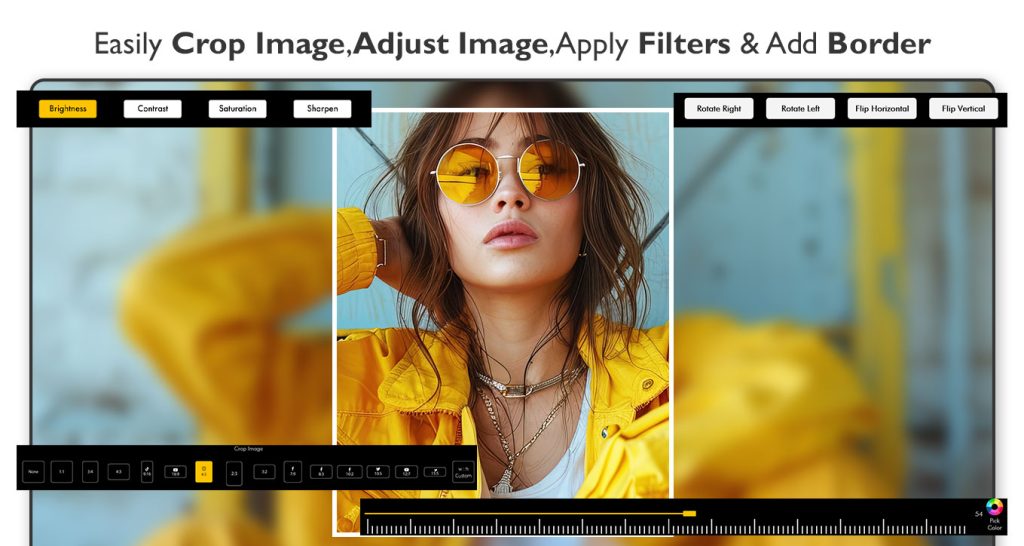
Click on the ‘Orientation’ icon to rotate the image left or right, or flip it horizontally or vertically.
Step 10:-
Use the ‘Enhance’ button to adjust image settings such as Brightness, Contrast, Saturation, and Sharpening.
Step 11:-
Tap the ‘Effect’ button to apply trending filter effects to your image.
Step 12:-
Click on the ‘Overlay’ button to add an overlay effect to your blended image.
Step 13:- Add a Border
Tap on the ‘Border’ option to apply an outer line or margin around your image.
Choose from a variety of colors, thickness levels, and styles to match your design.
Use the slider or presets to adjust the width of the border as needed.
Step 15: Apply a Frame
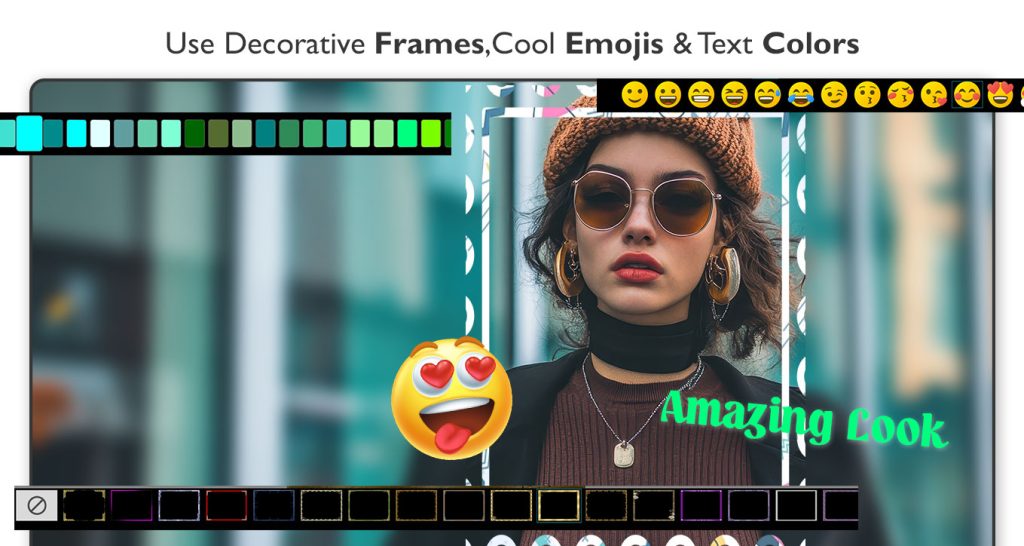
Select the ‘Frame’ feature to give your image a decorative edge.
Browse through a range of artistic, modern, vintage, and themed frames.
Frames automatically resize to fit your image, but you can also customize the look if the app allows.
Step 16: Add Stickers
Tap on the ‘Sticker’ button to decorate your image with fun or expressive icons.
Choose from categories such as emojis, shapes, accessories, seasonal items, and more.
Resize, rotate, and position the sticker anywhere on your image.
Step 17: Insert Text
Click on the ‘Text’ tool to add words or captions to your creation.
Enter your desired text and choose a font style from the available options.
Customize the font size, color, alignment, shadow, background, and spacing.
Drag the text to position it anywhere on the image.
Step 18: Use the Doodle Tool
Tap on the ‘Doodle’ option to draw freehand over your image.
Choose from different brush sizes, colors, and opacities.
Ideal for creative touches, signatures, or highlighting specific parts of the photo.
Use the eraser tool to fix or remove doodles as needed.
Step 19:- Save and Share
All done! Tap the ‘Save’ button to store your creation to your device.
Once saved, you can easily share your blended photo with family and friends through your favorite social media platforms or messaging apps.