Photo Grid Mixer is a versatile application that provides viewers with a stunning array of professionally developed grids and themes to embellish their photos. It’s the perfect tool for creating captivating collages, bringing together a myriad of pictures into a single frame through grid divisions. Unleash your creativity and craft awesome-looking collages in your unique style.
When crafting a collage, the app offers a variety of grid templates, as well as a free image collage option without grids. This flexibility empowers viewers to arrange their pictures according to their preferences. Select photos, choose your preferred photo shape and size, and let Photo Mixer transform your images into stylish and visually appealing collages. The application also supports multi-touch functionality, allowing users to adjust pictures with ease.
Photo Mixer is well-equipped to create Shape Collages from a vast collection and even offers Free Form Collages for users who prefer a more customized approach. With two-finger gestures, users can easily move, resize, and rotate photos to achieve the desired composition.
Featuring a user-friendly interface, simple design, and easy-to-use functionality, Photo Grid Mixer simplifies the process of making photo grids. Save and share your creations seamlessly on Instagram, Facebook, Twitter, Whatsapp, and other social networking platforms.
Download the application now and share your feedback! Here’s a guide to get you started with Photo Grid Mixer:
Dive into the world of creativity with Photo Grid Mixer, a thoughtfully curated and user-friendly application designed to help you craft wonderful grids with multiple photos. Now that you’ve successfully installed the app on your PC or laptop, let’s get started!
You will now see three options:
- Shape Collage
- Free Collage
- Photo Editor
- Aesthetic Frames
Shape Collage :-
Step 2:-
- Click on the Shape Collage option and select two or more images from your system gallery.
- Now, click on the Ratio button and choose your favorite social media collage ratio. The app provides trending collage ratios.
- Click on the Collage button and choose your favorite collage frame. The app provides many types of collage frames.
- Click on the Step button to adjust the border thickness and corner radius. You can also adjust the settings for your collage shape background.
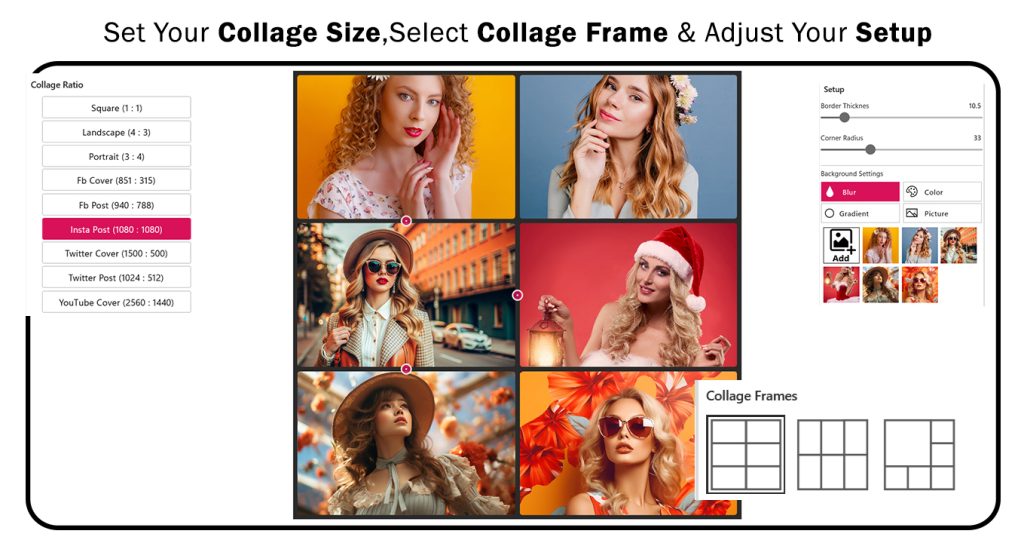
Step 2:-
- Click on the Filter button, choose your favorite filter effects, and apply them. The app provides many types of trending filter effects—just select one.
- Sticker button help to apply a trendy sticker and give a emotion on your collage creation.
- The Text button allows you to add text to your collage creation. You can easily change the font style, text color, adjust opacity, and much more.
- The Add Photo button allows you to apply an image as a sticker.
All done! Now, click on the Save button to save your shape creation and start sharing it with family and friends.
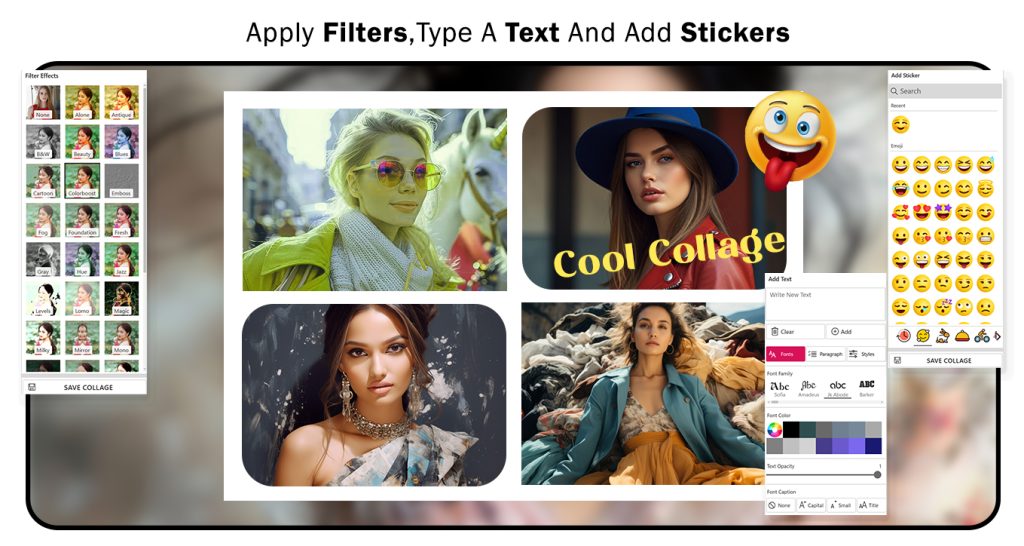
Free Collage-
Step 1:- After downloading the app, click on the Free Collage button to open it.
- Next, click on the Ratio button and choose your favorite social media collage ratio.
- The Add Photo button helps you add multiple photos to your free collage creation.
- You can also capture an image by clicking the Camera button.
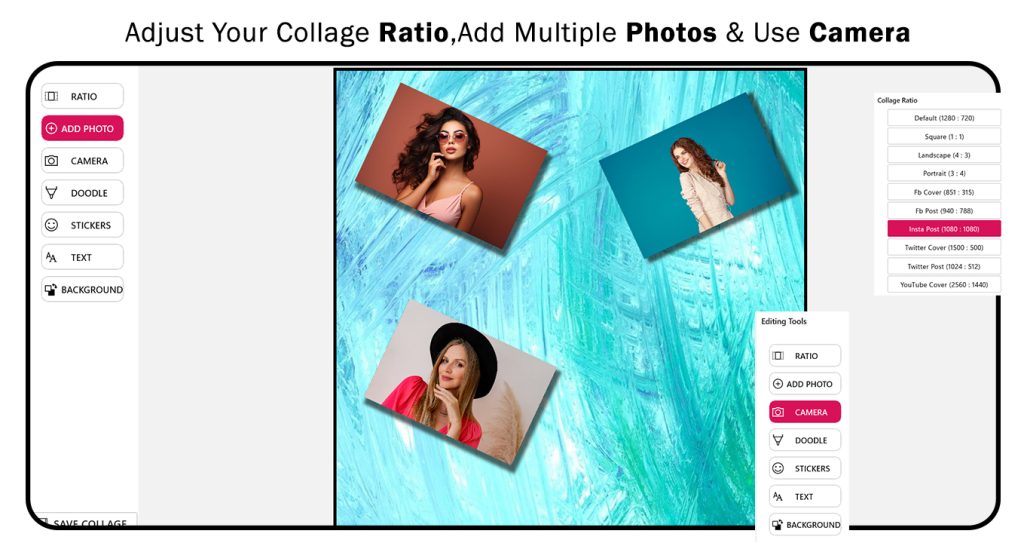
Step 2:-
- Next, click on the Doodle button, choose your favorite color, adjust the draw size, and create your doodle. If you want to correct any mistakes, click the Erase button, move the cursor, and correct it.
- Sticker button help to apply a trendy sticker and give a emotion on your Free collage creation.
- The Text button allows you to add text to your collage creation. You can easily change the font style, text color, adjust opacity, and much more.
- Now, click on the Background button and choose your favorite background. You can apply a color or a pattern to your background, as the app provides both options. You can also change the border color by simply choosing the choose Background Border option and adjusting the border color. Apply a color or pattern to your border.
All done! Now, save your free collage creation and start sharing it with family and friends.
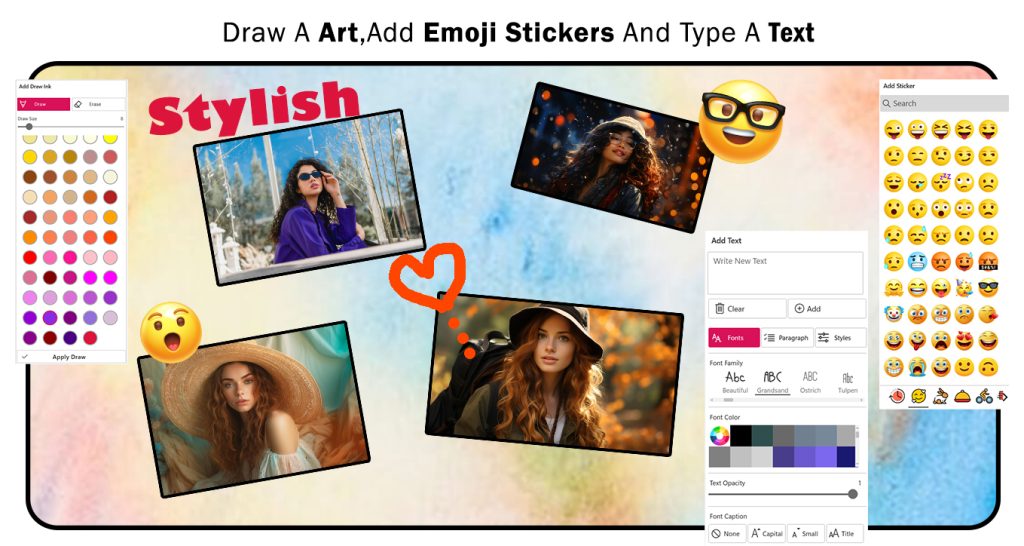
Photo Editor
Step 1:- After downloading the app, click on the Photo Editor button and choose a photo from your system gallery.
- Now, choose your favorite social media crop ratio. The app provides lots of trending crop ratios—select one. You can also flip and rotate your image, then apply the changes. Once done, click on the Crop & Next button to move to the next editing feature.
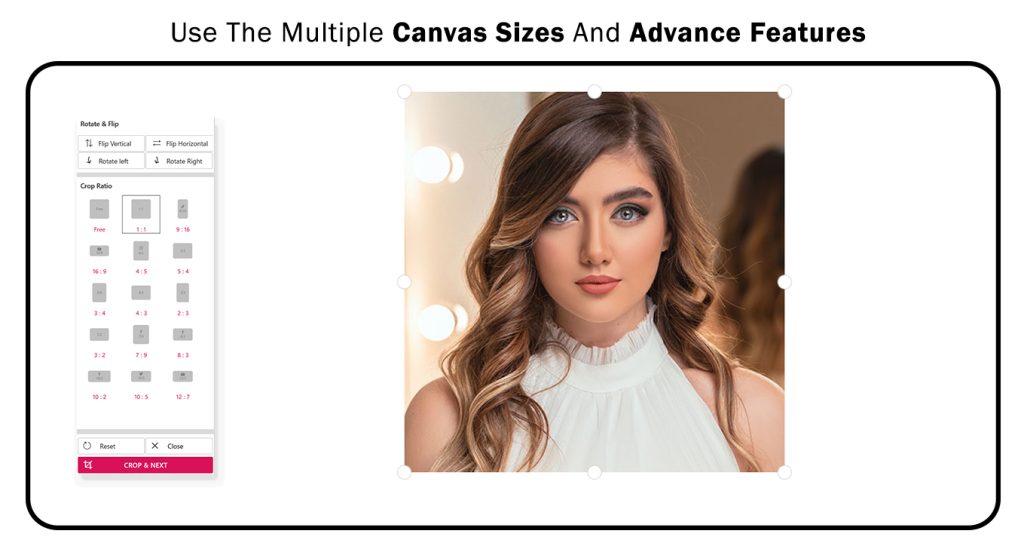
Step 2:-
- Click on the Filter option and apply a filter effect.
- After applying the filter, click on the Frame button, choose your favorite frame, and apply it to your image creation. The app provides lots of trending frames—just select one.
- Click on the Sticker button, choose your favorite sticker, and place it on your image. You can resize, rotate, and adjust the position as needed.
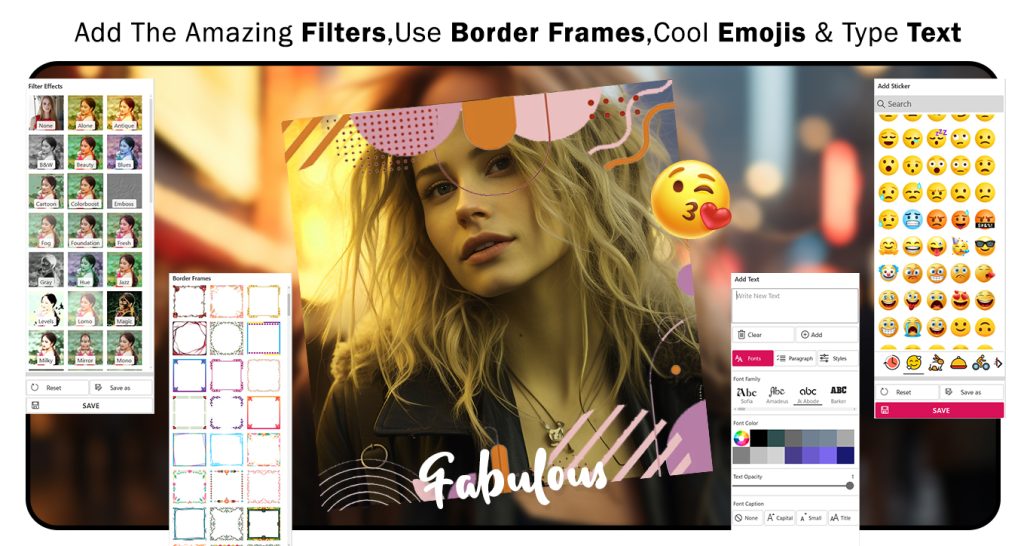
Step 3:-
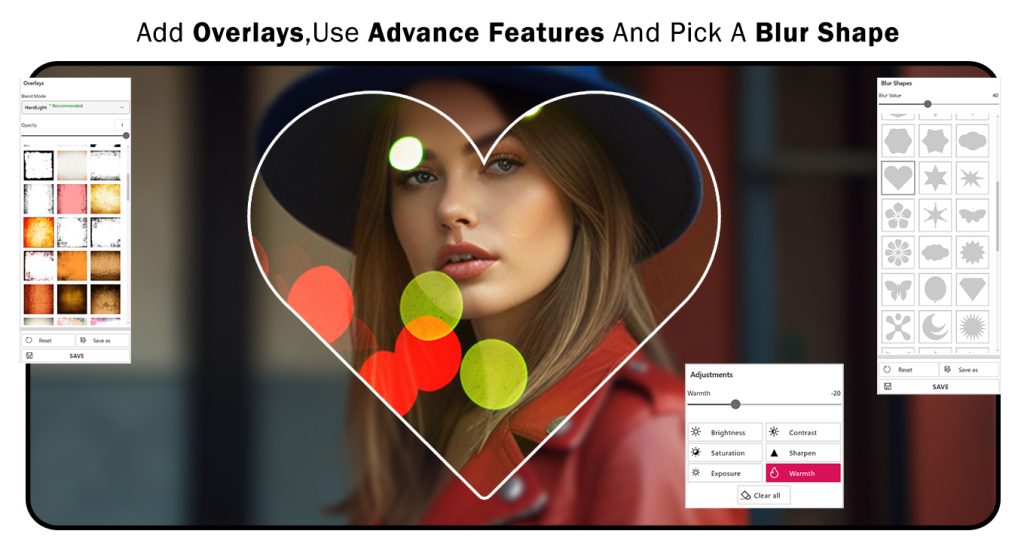
- Click on the Text button to add text to your image. You can change the font style, color, size, and position of the text. Adjust the opacity if needed.
- Click on the Overlay button to add a design or texture layer over your image. You can adjust the opacity and blend mode to achieve the desired effect.
- Click on the Adjustment button to modify the brightness, contrast, saturation, and other settings of your image. Adjust these sliders to enhance your image.
- Click on the Blur button to apply a blur effect shapes to your image. You can adjust the intensity of the blur for the desired look.
All done! Now, click on the Save button to save your creation and start sharing it with family and friends.
Aesthetic Frames
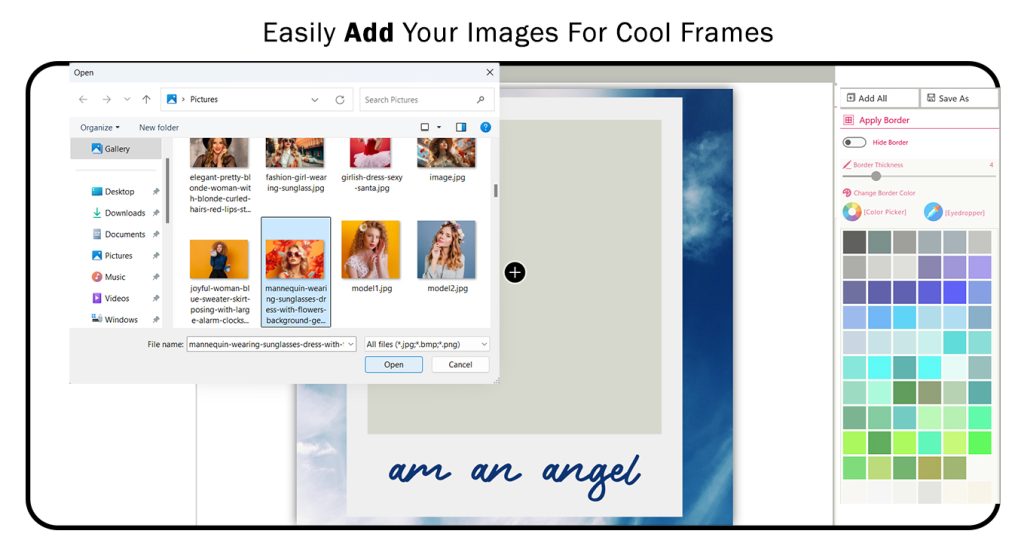
Step 1:- After opening the app, click on the Aesthetic Frames option, choose your favorite trending frame, and open it.
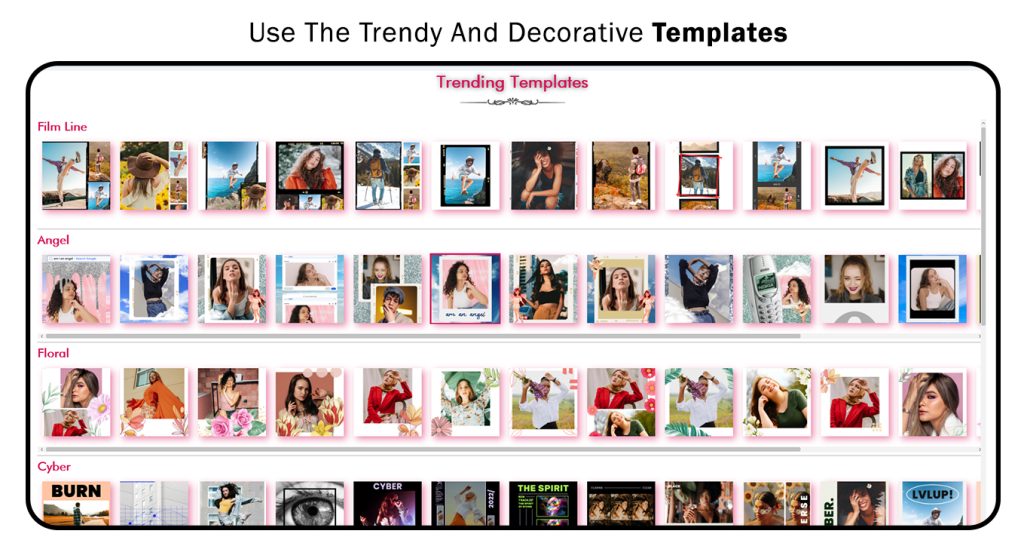
Step 2:-
- Now, click on the Template Image + icon and choose the image you want to use for the template.
- Click on the Border option to add a border around your image. You can adjust the thickness, color, and style of the border to match your design.
Step 3:-
- Click on the Text option to add text to your image. Customize the font, size, color, and position. You can also adjust the opacity and rotation of the text.
- Click on the Sticker option to add stickers to your image. Browse through the available stickers, choose one, and adjust its size, position, and rotation as needed.
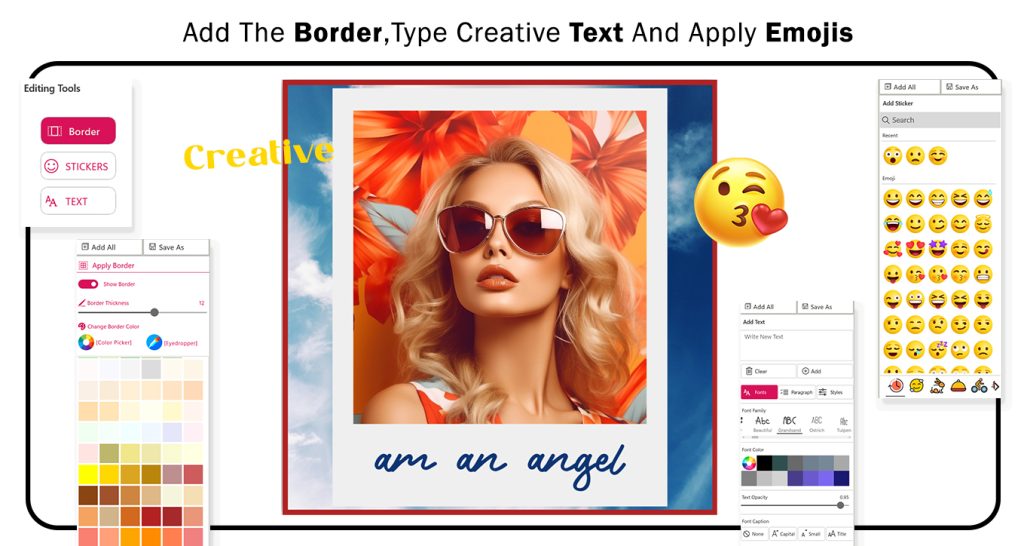
Step 4:- All done! Now, click on the Save button to save your aesthetic image creation.

